Red Velvet Cinnamon Rolls – Cream Cheese Swirls
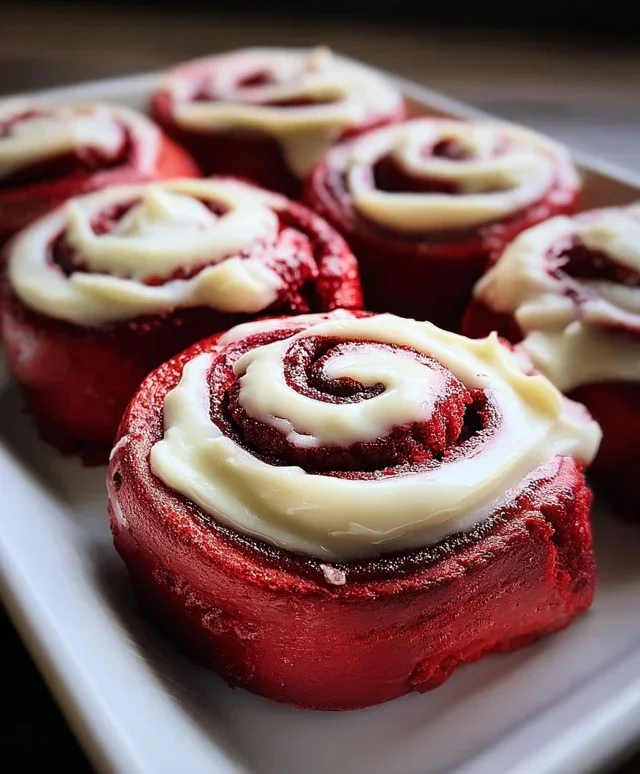
Red Velvet Cinnamon Rolls with Cream Cheese Icing are a dessert dream come true, transforming a classic breakfast favorite into a decadent treat that’s perfect for any occasion. We all adore the comforting swirl of cinnamon and sugar within a soft, pillowy dough, but imagin extracte that beloved experience elevated with the rich, cocoa-infused notes and vibrant crimson hue of red velvet. That’s exactly what these incredible red velvet cinnamon rolls deliver! They’re a symphony of textures and flavors – the tender dough, the sweet and spicy filling, and the tangy, luscious cream cheese icing that ties it all together. This isn’t just another cinnamon roll; it’s an indulgence, a showstopper that will have everyone asking for the recipe. Prepare to fall in love with these beautiful, delicious red velvet cinnamon rolls.
Red Velvet Cinnamon Rolls with Cream Cheese Icing
Get ready to indulge in a treat that’s as visually stunning as it is delicious! These Red Velvet Cinnamon Rolls are a delightful twist on a classic, combining the rich, deep flavor of red velvet cake with the comforting warmth of cinnamon. Topped with a tangy and sweet cream cheese icing, they are the perfect indulgence for brunch, a special occasion, or simply a cozy afternoon. The vibrant red hue makes them a showstopper, and the melt-in-your-mouth texture will have everyone asking for seconds. Don’t be intimidated by making cinnamon rolls from scratch; with these detailed instructions, you’ll be a pro in no time!
Ingredients:
Making the Dough
The foundation of any great cinnamon roll is a soft, pliable dough. We’ll start by activating our yeast. In a large bowl or the bowl of your stand mixer fitted with the dough hook, combine the warm milk, granulated sugar, and active dry yeast. Give it a gentle stir and let it sit for about 5-10 minutes. You should see it become frothy and bubbly on top, which is a sign that your yeast is alive and ready to work its magic. If it doesn’t foam, your yeast might be old, and you’ll need to start with a fresh packet.
Next, add the melted butter, the large egg, egg yolk, and vanilla extract to the yeast mixture. Whisk everything together until well combined. Now, it’s time to introduce the dry ingredients. In a separate medium bowl, whisk together the all-purpose flour, unsweetened cocoa powder, and salt. Gradually add the dry ingredients to the wet ingredients, mixing on low speed until a shaggy dough forms. This is where we’ll add our vibrant red velvet color! Add the red gel food coloring, starting with 1 teaspoon and adding more until you achieve your desired deep red hue. Gel food coloring is preferred as it’s more concentrated and won’t add excess moisture to the dough.
Once the color is incorporated, increase the mixer speed to medium-low and knead the dough for 6-8 minutes, or until it’s smooth, elastic, and pulls away from the sides of the bowl. If you’re kneading by hand, flour a clean surface and knead for about 8-10 minutes until the dough is smooth and elastic. The dough should be slightly sticky but not unmanageable. Lightly grease a clean large bowl with a bit of oil or cooking spray. Place the dough in the bowl, turning it to coat all sides. Cover the bowl tightly with plastic wrap or a clean kitchen towel and let it rise in a warm place for 1 to 1.5 hours, or until it has doubled in size.
Assembling the Rolls
Once your dough has beautifully risen, it’s time to shape these beauties! Gently punch down the dough to release the air. Turn the dough out onto a lightly floured surface. Using a rolling pin, roll the dough into a large rectangle, approximately 12×18 inches. Aim for an even thickness of about ¼ inch.
Now for that irresistible filling! In a small bowl, combine the softened butter, brown sugar, and ground cinnamon. Mix until it forms a thick, spreadable paste. Generously and evenly spread this cinnamon-sugar mixture over the rolled-out dough, leaving a small border (about ½ inch) along one of the long edges. This border will help seal the roll and prevent the filling from leaking out during baking.
Starting from the long edge opposite the border, tightly roll up the dough. Try to keep the roll as uniform as possible to ensure evenly sized cinnamon rolls. Once rolled, use a sharp knife or a piece of dental floss to cut the roll into 12 equal pieces. To use dental floss, slide a piece underneath the roll, cross the ends over the top, and pull them in opposite directions to slice through the dough. This method gives you cleaner cuts than a knife. Place the cinnamon roll slices, cut-side up, into a greased 9×13 inch baking dish. Ensure they are snug but not overly cramped, as they will expand during their second rise.
The Second Rise and Baking
Cover the baking dish loosely with plastic wrap and let the cinnamon rolls rise again in a warm spot for another 30-45 minutes, or until they are puffy and have almost doubled in size. This second rise is crucial for achieving that light and airy texture we all love in cinnamon rolls.
While the rolls are on their second rise, preheat your oven to 350°F (175°C). Once the rolls have finished their second rise and the oven is preheated, it’s time to bake! Place the baking dish in the preheated oven and bake for 25-30 minutes, or until the tops are golden brown and the centers are cooked through. You can test for doneness by gently pressing the center of a roll; it should spring back slightly. Be careful not to overbake, as this can result in dry rolls.
Whipping Up the Cream Cheese Icing
No cinnamon roll is complete without a luscious topping, and this cream cheese icing is the perfect complement to the red velvet flavor. In a medium bowl, beat the softened cream cheese and softened butter together until smooth and creamy. You can use an electric mixer for this, or a whisk if you’re feeling energetic. Make sure there are no lumps of cream cheese remaining.
Gradually add about ½ cup of powdered sugar (not listed in the origin extractal ingredients, but essential for icing consistency – if you’d like to omit, the rolls will be less sweet but still delicious!) and a splash of milk (about 1-2 tablespoons) until you reach your desired consistency. You want an icing that’s thick enough to coat the rolls but still pourable. Add a tiny splash of vanilla extract for an extra flavor boost.
Once the cinnamon rolls are out of the oven and still warm, generously drizzle or spread the cream cheese icing over the top. The warmth of the rolls will help the icing melt slightly and create that irresistible gooey glaze. Let them cool slightly before serving. These Red Velvet Cinnamon Rolls are best enjoyed fresh, but any leftovers can be stored in an airtight container at room temperature for a day or two, or in the refrigerator for longer storage. Enjoy every delicious bite!
Conclusion:
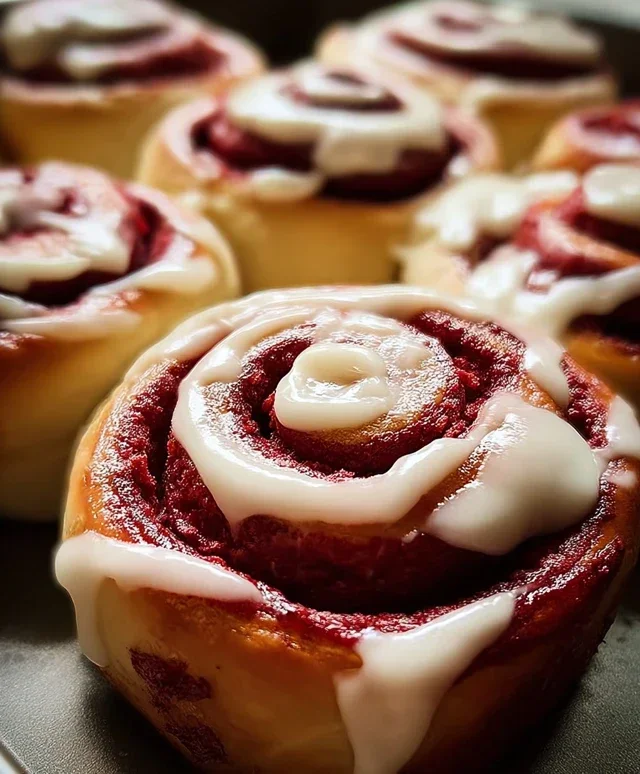
I hope you’re as excited as I am to try these decadent Red Velvet Cinnamon Rolls with Cream Cheese Icing! This recipe is a true showstopper, combining the beloved flavors of rich red velvet cake with the comforting warmth of cinnamon spice, all topped with a luscious, tangy cream cheese frosting. They’re perfect for holidays, special occasions, or simply when you crave a truly indulgent treat. Imagin extracte the vibrant red swirl peeking through fluffy dough, the sweet aroma filling your kitchen – it’s an experience for all the senses!
These delightful rolls are fantastic served warm, making them an ideal brunch item or a perfect dessert after a cozy dinner. They pair beautifully with a strong cup of coffee or a tall glass of cold milk. For a little extra flair, consider a sprinkle of festive colored sanding sugar or some chopped toasted pecans on top of the icing.
Don’t be afraid to get creative! If you’re not a fan of cream cheese frosting, a simple vanilla glaze or a chocolate ganache would also be delicious. You could also add a touch of espresso powder to the cinnamon filling for a mocha twist. I truly encourage you to give this Red Velvet Cinnamon Rolls with Cream Cheese Icing recipe a go. You won’t regret the little bit of extra effort for such a rewarding outcome!
Frequently Asked Questions:
Can I make the dough ahead of time?
Yes, absolutely! You can prepare the dough and let it do its first rise in the refrigerator overnight. This not only saves you time on the day you want to bake them but also develops a deeper flavor in the dough. Just let it come to room temperature slightly before shaping and baking.
How do I store leftover cinnamon rolls?
Store any leftover Red Velvet Cinnamon Rolls in an airtight container at room temperature for up to 2 days, or in the refrigerator for up to 4 days. For the best texture, you can gently reheat them in a microwave for about 10-15 seconds before serving.
My red velvet color isn’t as vibrant as I’d like. What can I do?
Ensure you’re using a good quality red food coloring, and don’t be shy with it! Sometimes, depending on the cocoa powder used, you might need a bit more to achieve that signature vibrant hue. You can also try using a combination of gel food coloring for a more intense color payoff.
Red Velvet Cinnamon Rolls with Cream Cheese Icing
Decadent red velvet cinnamon rolls infused with cinnamon and topped with a tangy cream cheese frosting. A delightful twist on a classic.
Ingredients
-
1 cup warm milk (110°F)
-
2 ¼ tsp (1 packet) active dry yeast
-
¼ cup granulated sugar
-
¼ cup unsalted butter, melted
-
1 large egg + 1 egg yolk
-
1 tbsp vanilla extract
-
3 cups all-purpose flour
-
¼ cup unsweetened cocoa powder
-
1 tsp salt
-
1-2 tsp red gel food coloring
-
½ cup unsalted butter, softened
-
1 cup brown sugar
-
2 tbsp ground cinnamon
-
4 oz cream cheese, softened
-
¼ cup unsalted butter, softened
Instructions
-
Step 1
In a large bowl, combine warm milk, yeast, and granulated sugar. Let sit for 5-10 minutes until foamy. -
Step 2
Stir in melted butter, egg, egg yolk, and vanilla extract into the yeast mixture. Gradually add flour, cocoa powder, salt, and red food coloring. Mix until a soft dough forms. Knead on a floured surface for 5-7 minutes until smooth. -
Step 3
Place dough in a greased bowl, cover, and let rise in a warm place for 1 hour, or until doubled in size. -
Step 4
Punch down the dough. On a floured surface, roll into a 12×16 inch rectangle. Spread softened butter evenly over the dough. In a separate bowl, mix brown sugar and cinnamon. Sprinkle evenly over the buttered dough. Roll up tightly from the long end. -
Step 5
Cut the roll into 12 equal slices. Place slices in a greased baking dish. -
Step 6
Cover and let rise for another 30 minutes. -
Step 7
Preheat oven to 375°F (190°C). Bake for 20-25 minutes, or until golden brown. -
Step 8
While rolls are baking, prepare the icing. Beat softened cream cheese and softened butter until smooth. Gradually add powdered sugar (if desired, not listed in original ingredients) and a splash of milk until desired consistency is reached. (Note: Powdered sugar was omitted as it was not in the provided ingredient list.) -
Step 9
Spread icing over warm cinnamon rolls.
Important Information
Nutrition Facts (Per Serving)
It is important to consider this information as approximate and not to use it as definitive health advice.
Allergy Information
Please check ingredients for potential allergens and consult a health professional if in doubt.