Cowboy Caviar Recipe-Fresh & Zesty Party Dip
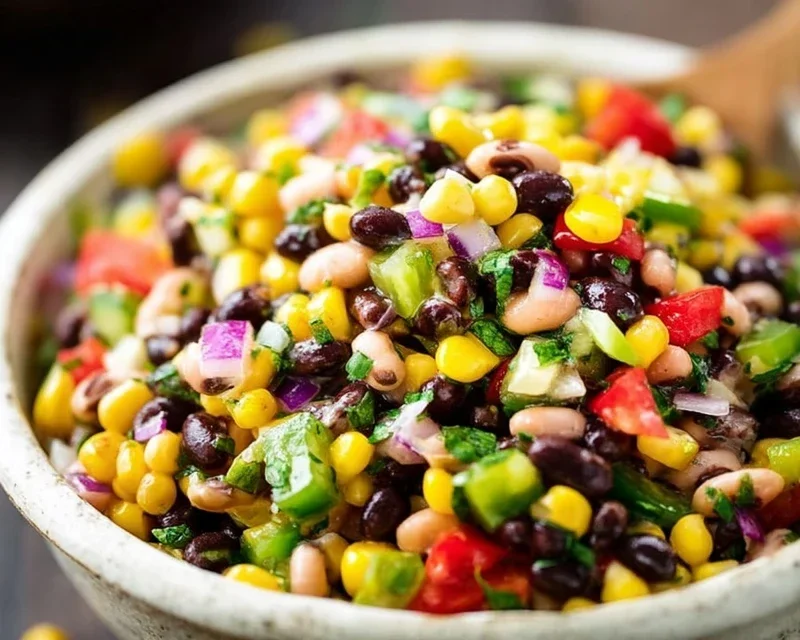
Cowboy Caviar is more than just a dip; it’s a vibrant fiesta in a bowl, a guaranteed crowd-pleaser that transcends seasons and occasions. Have you ever craved a dish that’s bursting with fresh flavors, offers a delightful mix of textures, and is effortlessly satisfying? That’s precisely the magic of Cowboy Caviar. It’s the perfect answer to potlucks, backyard barbecues, or even just a Tuesday night when you want something exciting and delicious. What makes this Tex-Mex inspired concoction so universally loved? It’s the incredible balance: the sweet corn, the tangy lime, the creamy avocado, the satisfying crunch of black beans and bell peppers, all mingling with a hint of spice. Each spoonful of this Cowboy Caviar delivers a complex yet harmonious symphony of tastes and sensations that keeps everyone coming back for more. It’s simple to make, incredibly versatile, and always a hit. Get ready to discover why this dish has earned its legendary status!
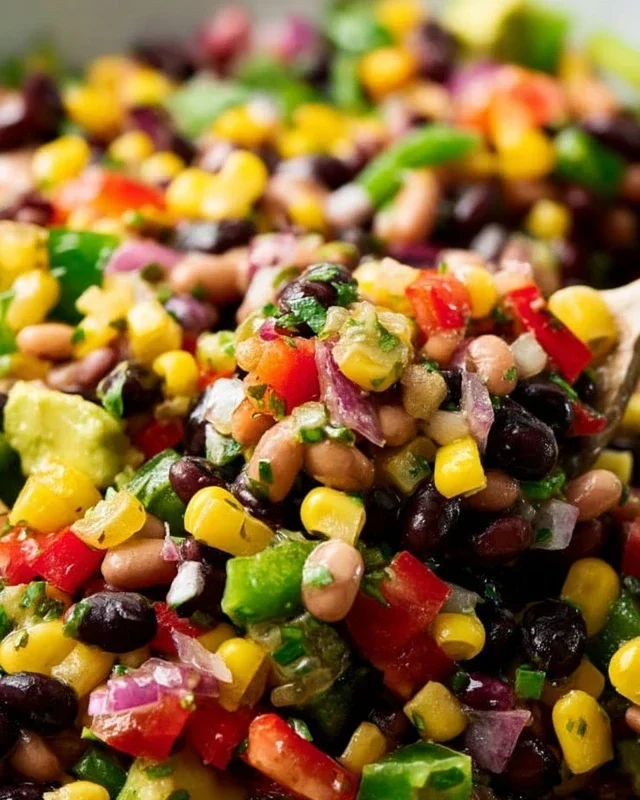
Cowboy Caviar: A Flavor Fiesta in Every Bite
Get ready to tantalize your taste buds with Cowboy Caviar, a vibrant and incredibly versatile dish that’s a guaranteed crowd-pleaser. Forget the fancy, intimidating “caviar” – this is Texas-style sunshine in a bowl, bursting with fresh flavors and a satisfying crunch. It’s the perfect appetizer for your next backyard barbecue, a healthy and delicious lunch, or even a vibrant side dish that will elevate any meal. What I love most about Cowboy Caviar is its simplicity and how adaptable it is. You can whip it up in minutes, and it only gets better as the flavors meld together. Plus, it’s a fantastic way to sneak in a boatload of fresh veggies!
Ingredients:
Crafting Your Cowboy Caviar: Step-by-Step
This recipe is as straightforward as it gets, making it perfect for even the most novice cooks. The beauty lies in the fresh ingredients coming together in a harmonious blend of sweet, savory, and a touch of heat.
Step 1: Preparing the Foundation
The first step is to gather all your chopped and prepped ingredients. This is where the magic starts to happen visually – a rainbow of colors waiting to be combined. Take your drained and rinsed black beans and place them in a large mixing bowl. The rinsing step is crucial; it removes any excess starch and “tinny” flavor from the canned beans, ensuring a cleaner taste. Next, add your drained whole kernel sweet corn. If you’re using frozen corn, make sure it’s fully thawed and patted dry to prevent your caviar from becoming watery. Now, let’s add the color and crunch: the diced red bell pepper and the minced jalapeno pepper. For the jalapeno, I like to remove the seeds and membranes for a milder heat. If you enjoy a spicier kick, feel free to leave some of them in. Remember to wear gloves when handling jalapenos, or wash your hands thoroughly afterward to avoid any lingering burn!
Step 2: Introducing Aromatics and Freshness
With the base ingredients in place, it’s time to add some fragrant and zesty components. Finely chop your fresh cilantro and add it to the bowl. Cilantro is an essential element in many Southwestern dishes, and its bright, herbaceous notes are a perfect complement to the other flavors. Next, add your diced red onion. Red onion provides a lovely sharp bite that balances the sweetness of the corn and the richness of the avocado. I like to dice my red onion quite finely so that its flavor is distributed evenly throughout the caviar without overpowering any other ingredient.
Step 3: The Heart of the Caviar – The Dressing
Now, we move on to creating the luscious dressing that will bind all these wonderful ingredients together. In a separate small bowl, whisk together the lime juice and the red grape juice vinegar. The lime juice brings a fantastic tang and freshness, while the red grape juice vinegar adds a subtle fruity sweetness and a beautiful ruby hue that enhances the overall visual appeal. Add the salt and ground black pepper to this mixture. Seasoning is key, so don’t be shy with the salt and pepper – they bring out the best in all the other ingredients. For a touch of sweetness that perfectly balances the acidity, stir in the honey. Finally, for a whisper of warmth and complexity, add the chili powder. Whisk everything together until it’s well combined and the honey has dissolved.
Step 4: Bringin extractg It All Together
Now comes the exciting part – combining the dressing with all the prepared ingredients. Pour the dressing mixture over the black beans, corn, bell pepper, jalapeno, cilantro, and red onion in the large mixing bowl. Gently toss everything together until all the ingredients are evenly coated with the dressing. Be careful not to overmix, as we want to keep the ingredients distinct and avoid mushing them. This is also the time to add your diced avocados. Avocados add a creamy richness and a delightful texture that truly makes this dish feel like a luxurious “caviar.” I recommend dicing the avocados just before adding them to prevent them from browning too quickly. Gently fold them into the mixture, ensuring they are coated without being mashed.
Step 5: The Waiting Game (and Why It’s Worth It!)
While you can serve your Cowboy Caviar immediately, I highly recommend allowing it to chill in the refrigerator for at least 30 minutes to an hour. This chilling time is crucial for allowing all the flavors to meld and deepen. The acidity in the lime juice and vinegar will gently “cook” the onions, softening their bite, and all the spices will have time to infuse into the beans and corn. You’ll notice the flavors becoming more complex and harmonious. This dish is also fantastic made a day in advance, making it a perfect make-ahead option for parties. The longer it sits, the more delicious it becomes. Taste and adjust seasoning before serving if needed.
Cowboy Caviar is wonderfully versatile. Serve it with tortilla chips for a classic dip experience. It’s also fantastic spooned over grilled chicken or fish, as a vibrant salad topping, or even as a filling for tacos or wraps. Enjoy this taste of the Southwest!
Conclusion:
So there you have it – your guide to making a truly spectacular Cowboy Caviar! This recipe is a fantastic choice because it’s incredibly vibrant, packed with fresh flavors, and surprisingly easy to whip up. It’s the perfect make-ahead dish, meaning it only gets better as the ingredients meld together. Whether you’re bringin extractg it to a potluck, serving it at a barbecue, or just craving a healthy and delicious snack, this Cowboy Caviar is sure to be a crowd-pleaser. Don’t hesitate to experiment with the serving suggestions – it’s wonderfully versatile!
For serving, think beyond just tortilla chips! It’s absolutely delicious spooned into lettuce wraps for a lighter option, piled high on grilled chicken or fish, or even used as a flavorful topping for tacos and quesadillas. Feel free to adjust the spice level to your liking, and consider adding other vegetables like finely diced bell peppers in different colors or even some corn kernels for extra sweetness. I truly encourage you to give this recipe a try; you won’t be disappointed by how much flavor and fun it brings to your table!
Frequently Asked Questions about Cowboy Caviar:
How long does Cowboy Caviar last in the refrigerator?
Cowboy Caviar is best enjoyed within 3-4 days when stored in an airtight container in the refrigerator. The flavors actually continue to develop and deepen during this time, making it an excellent dish to prepare in advance.
Can I make this recipe without black beans?
Absolutely! While black beans are a classic component, you can easily substitute them with other legumes like pinto beans or even kidney beans. Some people also enjoy using cannellini beans for a slightly milder flavor. The key is to maintain a similar texture and volume.
What if I don’t like cilantro?
No problem at all! Cilantro is a strong flavor that not everyone enjoys. You can simply omit it from the recipe. Alternatively, you could try substituting it with a small amount of finely chopped fresh parsley or mint for a different, but still refreshing, herbaceous note.
Cowboy Caviar
A vibrant and flavorful Tex-Mex inspired bean and corn salad, perfect as a dip or side dish. This recipe is a refreshing and healthy option that’s easy to prepare.
Ingredients
-
15 oz black beans, drained and rinsed
-
15.25 oz whole kernel sweet corn, drained
-
1 small red bell pepper, diced
-
1 jalapeno pepper, minced
-
1/3 cup fresh cilantro, finely chopped
-
3/4 cup diced red onion
-
2 avocados, diced
-
1/4 cup lime juice
-
2 tablespoons red grape juice vinegar
-
1 teaspoon salt
-
1/2 teaspoon ground black pepper
-
1 tablespoon honey
-
1/4 teaspoon chili powder
Instructions
-
Step 1
In a large bowl, combine the drained and rinsed black beans, drained whole kernel sweet corn, diced red bell pepper, minced jalapeno pepper, finely chopped cilantro, and diced red onion. -
Step 2
Gently stir in the diced avocados. Be careful not to mash them. -
Step 3
In a small separate bowl, whisk together the lime juice, red grape juice vinegar, salt, ground black pepper, honey, and chili powder to create the dressing. -
Step 4
Pour the dressing over the bean and corn mixture. Toss gently to coat all ingredients evenly. -
Step 5
For best results, cover and refrigerate for at least 30 minutes to allow the flavors to meld before serving.
Important Information
Nutrition Facts (Per Serving)
It is important to consider this information as approximate and not to use it as definitive health advice.
Allergy Information
Please check ingredients for potential allergens and consult a health professional if in doubt.