Homemade Oreo Cookies- Easy & Delicious Recipe
Homemade Oreo Cookies are a childhood dream brought to life, a nostalgic treat that evokes pure joy with every bite. Have you ever found yourself craving that perfectly balanced dark chocolate cookie with that sweet, creamy filling, only to be disappointed by store-bought versions? I certainly have! That’s why embarking on the journey to create your own homemade Oreo cookies is so incredibly rewarding. It’s not just about replicating a beloved snack; it’s about infusing your kitchen with the rich aroma of chocolate and the satisfying hum of your mixer as you bring this iconic cookie to life. These aren’t just cookies; they’re edible moments of happiness, a testament to the magic you can create with a few simple ingredients and a whole lot of love. Get ready to discover how truly special these homemade Oreo cookies are!
Homemade Oreo Cookies
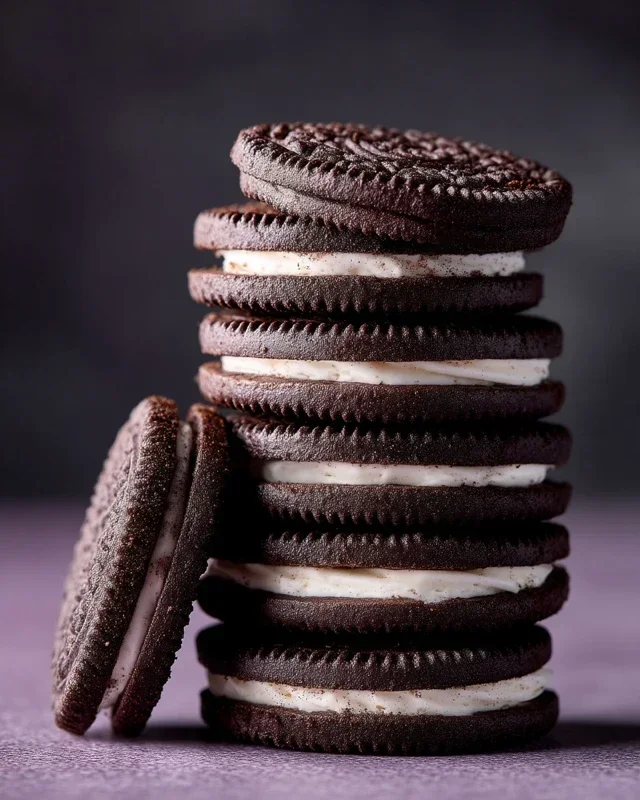
There’s something incredibly satisfying about recreating a beloved classic in your own kitchen. For me, that classic is the iconic Oreo cookie. Forget the store-bought versions; the rich, dark chocolatey flavor and crisp texture of a homemade Oreo are simply in a league of their own. This recipe, while requiring a bit of patience, delivers results that will have you questioning why you ever settled for anything less. The deep chocolate flavor of the cookie, perfectly complemented by the sweet, creamy vanilla filling, is a match made in dessert heaven. Get ready to impress yourself and anyone lucky enough to snag one of these homemade beauties!
Ingredients:
Making the Dark Chocolate Cookie Discs
The foundation of our homemade Oreo is a rich, deeply flavored chocolate cookie. It’s crucial to get the consistency right here, as this will determine the final texture.
1. Combine Dry Ingredients: In a medium bowl, whisk together the all-purpose flour, cocoa powder (Dutch-process will give a deep brown, while black cocoa powder will produce an intensely dark, almost black cookie, truly mimicking the Oreo aesthetic), baking soda, baking powder, and 1/4 teaspoon of fine sea salt. Whisking ensures that all the leavening agents and salt are evenly distributed, which will lead to a consistent rise and flavor in your cookies. Set this aside.
2. Cream Butter and Sugar: In the bowl of a stand mixer fitted with the paddle attachment (or using a hand mixer and a large bowl), cream together the granulated sugar and the 10 tablespoons of unsalted butter. It’s important that the butter is at a “cool” room temperature – meaning it’s softened enough to be easily indented with your finger, but not so warm that it’s greasy or melted. This is key for achieving a light and airy cookie dough. Beat on medium speed until the mixture is pnon-alcoholic ale and fluffy, which should take about 3-4 minutes. This process incorporates air into the dough, contributing to the cookie’s texture. Scrape down the sides of the bowl as needed.
3. Add Egg and Vanilla: Add the large egg to the creamed butter and sugar mixture. Beat on low speed until just combined. Don’t overmix at this stage, as too much beating can develop the gluten in the flour too early, leading to tough cookies. Next, add the 2 ½ teaspoons of pure vanilla extract and mix until incorporated. The vanilla adds a wonderful aroma and enhances the chocolate flavor.
4. Incorporate Dry Ingredients: With the mixer on low speed, gradually add the dry ingredients from step 1 to the wet ingredients. Mix until just combined and no dry streaks of flour remain. The dough will be quite stiff and dark. It might look a bit crum extractbly at first, but keep mixing. Again, avoid overmixing here. Once the dough just comes together, stop the mixer.
5. Chill the Dough: Turn the dough out onto a clean surface and gently bring it together into a cohesive disc. It will be a bit sticky. Wrap the disc tightly in plastic wrap and refrigerate for at least 2 hours, or preferably longer. Chilling is a critical step. It solidifies the fat in the dough, making it easier to roll out without sticking, and it allows the flavors to meld. It also prevents the cookies from spreading too much in the oven, ensuring they maintain their shape. You can even make the dough a day in advance.
Shaping and Baking the Cookies
Once the dough is well-chilled, it’s time to create those signature cookie discs.
1. Roll and Cut the Cookies: Preheat your oven to 350°F (175°C). Line baking sheets with parchment paper. Take the chilled dough out of the refrigerator. It will be firm. Let it sit at room temperature for about 5-10 minutes to soften slightly, making it easier to handle but not so much that it becomes sticky again. Lightly flour a clean work surface and your rolling pin. Roll the dough to about 1/8-inch thickness. It’s important to aim for an even thickness so the cookies bake uniformly. Use a round cookie cutter (about 1.5 to 2 inches in diameter) to cut out your cookie discs. Re-roll scraps gently, but avoid overworking them. Place the cut cookies onto the prepared baking sheets, leaving about 1 inch between them.
2. Bake to Perfection: Bake the cookies for 10-12 minutes. The cookies are done when they feel firm to the touch and the edges are slightly set. They won’t look particularly “done” in the traditional sense of browning, due to their dark color. Keep a close eye on them to prevent burning. Let the cookies cool on the baking sheets for 5 minutes before carefully transferring them to a wire rack to cool completely. It’s essential that they are completely cool before filling.
Whipping Up the Creamy Vanilla Filling
This is the sweet, luscious counterpart to our dark chocolate cookies. The key here is a smooth, creamy, and not-too-sweet filling.
1. Cream the Butter: In a clean bowl of a stand mixer (or using a hand mixer and a large bowl), beat the remaining 1 stick (113 grams) of unsalted butter on medium-high speed until it’s very light and fluffy. This butter should also be at a cool room temperature, similar to what we used for the cookie dough. Beat it for at least 2-3 minutes.
2. Add Powdered Sugar and Salt: Gradually add the sifted powdered sugar and the 1/8 teaspoon of fine sea salt to the creamed butter. Sifting the powdered sugar is important to prevent lumps in your filling, ensuring a silky-smooth texture. Start the mixer on low speed to incorporate the sugar, then increase to medium-high speed and beat until the mixture is smooth and creamy. Scrape down the sides of the bowl as needed.
3. Incorporate Vanilla and Achieve Texture: Add the remaining 2 ½ teaspoons of pure vanilla extract. Continue beating until the filling is light, airy, and has a consistency similar to frosting. If the filling seems too thick, you can add a tiny splash of milk (about 1 teaspoon at a time) until you reach your desired consistency. If it seems too thin, add a little more sifted powdered sugar. The goal is a spreadable, but not runny, filling.
Assembling Your Homemade Oreos
The final, and arguably most fun, step is bringin extractg it all together!
1. Sandwich the Cookies: Once both the cookie discs and the filling are completely cooled, it’s time to assemble. Take one cookie disc and spread a generous dollop of the vanilla filling onto the flat side. Use an offset spatula or the back of a spoon to spread the filling evenly, going almost to the edge. Then, gently top with another cookie disc, pressing down slightly to sandwich the filling. Repeat with the remaining cookie discs and filling.
Enjoy these incredible homemade Oreo cookies! They are best enjoyed within a few days of making them, stored in an airtight container. You’ve just created a truly special treat that tastes even better than the origin extractal. Happy baking!
Conclusion:
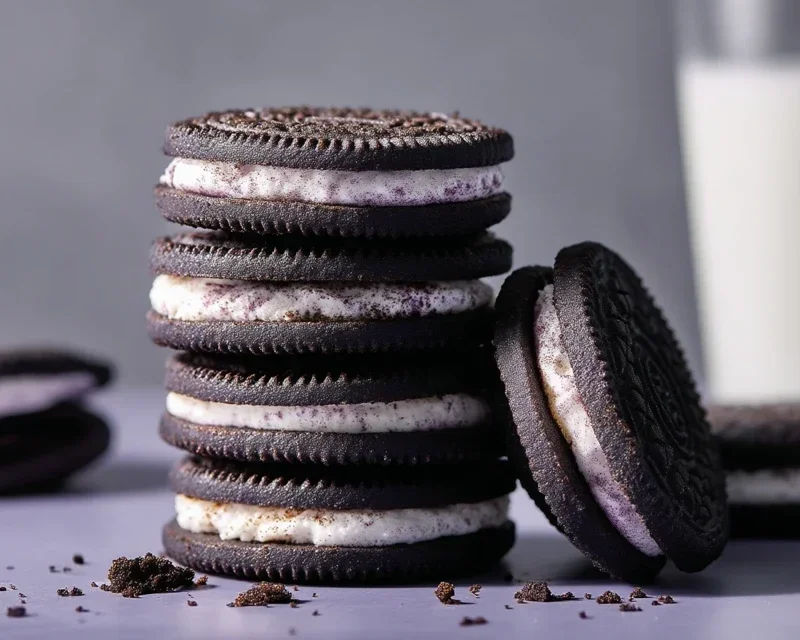
And there you have it – a guide to creating your very own homemade Oreo cookies! I hope you’re as excited as I am about ditching the store-bought versions and indulgin extractg in these delicious, handcrafted treats. This recipe is fantastic because it allows you to control the ingredients, achieve that perfect balance of crunchy cookie and creamy filling, and frankly, the satisfaction of making them from scratch is unparalleled. Imagin extracte the delight on your loved ones’ faces when you present them with a batch of these!
These delectable cookies are perfect served with a cold glass of milk, of course, but they also shine as an ice cream topping, crushed into milkshakes, or even as a base for mini cheesecakes. Don’t be afraid to get creative with variations! You could add a pinch of espresso powder to the cookie dough for a mocha twist, or experiment with different extracts in the filling like mint or peppermint.
I truly encourage you to give this recipe a try. It’s a rewarding baking adventure that yields incredibly tasty results. So, preheat your ovens, gather your ingredients, and get ready to bake up some magic!
Frequently Asked Questions:
Can I make the dough ahead of time?
Absolutely! You can prepare the cookie dough and the filling separately and store them in airtight containers in the refrigerator for up to 2-3 days. This makes assembly on baking day even quicker!
My filling is too runny. What can I do?
If your filling seems too soft, try chilling it in the refrigerator for about 30 minutes to an hour. You can also try adding a little more powdered sugar, a tablespoon at a time, until it reaches your desired consistency. Be careful not to add too much, or it can become too stiff.
Can I freeze these homemade Oreo cookies?
Yes, you can freeze the baked and cooled cookies. Store them in an airtight container with parchment paper between layers to prevent sticking. They should keep well for up to 2-3 months.
Homemade Oreo Cookies
Create delicious, homemade chocolate sandwich cookies with a creamy filling, inspired by classic Oreos. Perfect for baking enthusiasts.
Ingredients
-
1 1/4 cups (159 grams) all-purpose flour
-
1/2 cup (43 grams) Dutch-process cocoa powder or Black cocoa powder
-
1 teaspoon baking soda
-
1/4 teaspoon baking powder
-
1/4 teaspoon fine sea salt
-
1 cup (200 grams) granulated sugar
-
10 tablespoons (142 grams) unsalted butter, at a cool room temperature, cut into chunks
-
1 large egg, at room temperature
-
1 stick (113 grams) unsalted butter, at a cool room temperature
-
2 ½ teaspoons pure vanilla extract
-
2 1/2 cups (313 grams) powdered sugar, sifted
-
1/8 teaspoon fine sea salt
Instructions
-
Step 1
In a medium bowl, whisk together the flour, cocoa powder, baking soda, baking powder, and salt. -
Step 2
In a large bowl, cream together the granulated sugar and the first portion of butter until light and fluffy. Beat in the egg and vanilla extract until well combined. -
Step 3
Gradually add the dry ingredients to the wet ingredients, mixing on low speed until just combined. Do not overmix. Divide the dough in half, flatten each half into a disk, wrap in plastic wrap, and refrigerate for at least 1 hour. -
Step 4
Preheat oven to 350°F (175°C). Line baking sheets with parchment paper. Roll out one disk of dough at a time to 1/4-inch thickness on a lightly floured surface. Cut out circles using a 1.5-inch round cutter. Place cookies on prepared baking sheets. -
Step 5
Bake for 10-12 minutes, or until the edges are firm. Let cool on the baking sheets for a few minutes before transferring to a wire rack to cool completely. -
Step 6
For the filling, beat together the second portion of butter and vanilla extract until creamy. Gradually add the sifted powdered sugar and salt, beating until smooth and fluffy. Add milk, 1 tablespoon at a time, if needed to reach desired consistency. -
Step 7
Pair up cooled cookies and spread a generous amount of filling on the flat side of one cookie. Top with another cookie, pressing gently to sandwich the filling.
Important Information
Nutrition Facts (Per Serving)
It is important to consider this information as approximate and not to use it as definitive health advice.
Allergy Information
Please check ingredients for potential allergens and consult a health professional if in doubt.