Quick Pickled Red Onions – Easy & Flavorful
Pickled red onions are a game-changer for so many dishes, transforming everyday meals into something truly spectacular. You know that moment when you’re eating a taco, a gourmet sandwich, or even just a simple salad, and there’s that vibrant burst of tangy, slightly sweet flavor with a satisfying crunch? That’s the magic of perfectly pickled red onions. I absolutely adore them because they add an instant layer of complexity and brightness that elevates almost anything they touch. What makes these particular pickled red onions so special is their beautiful ruby-red hue and the delightful balance of acidity and subtle sweetness they possess. They’re not just a garnish; they’re a flavor enhancer that I find myself reaching for constantly, and once you try them, I’m confident you will too!
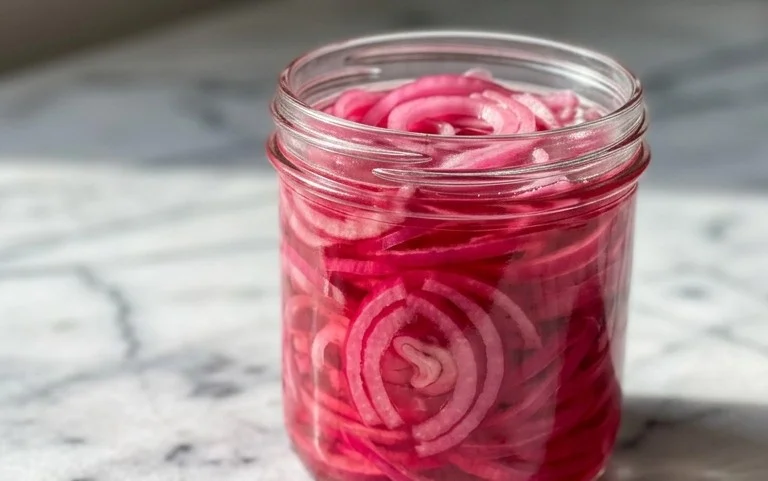
Pickled Red Onions
There’s something incredibly satisfying about having a jar of vibrant, tangy pickled red onions ready to elevate your meals. They’re the unsung heroes of salads, sandwiches, tacos, and even a simple avocado toast. Forget those bland, mushy versions you might have encountered; these homemade pickled red onions are crisp, bright, and bursting with flavor. They’re surprisingly easy to make, requiring just a handful of pantry staples and a little bit of waiting time. The magic happens as the raw onions transform into a jewel-toned delicacy, their sharp bite mellowing into a delightful tang with a hint of sweetness. Once you try these, you’ll wonder how you ever lived without them. They’re not just a condiment; they’re a flavor enhancer, a visual delight, and a testament to how simple ingredients can create something truly special.
Ingredients:
Instructions:
The process of pickling red onions is wonderfully straightforward. It primarily involves thinly slicing the onions and then submergin extractg them in a hot brine. The heat of the brine cooks the onions slightly, softening them just enough to absorb all the delicious pickling liquid while retaining a pleasant crunch. The acidity of the vinegar, the sweetness of the sugar, and the salt all work together to create a perfectly balanced flavor profile. Here’s how we’ll bring these beauties to life:
1. Preparing the Onions
Start by peeling your red onions. The outer papery skin should come off easily. Once peeled, trim off the root end and the very top stem. Now, the key to good pickled onions is the slicing. You want them to be thin enough to absorb the brine quickly but not so thin that they disintegrate. I find that slicing them in half from root to stem, and then cutting them into thin half-moons, about 1/8 to 1/4 inch thick, works best. If you have a mandoline slicer, this is your moment to shine! Just be sure to use the safety guard. If you’re slicing by hand, take your time and aim for consistency. The thinner you slice them, the faster they’ll pickle, but you also risk them becoming limp if they’re too thin.
2. Creating the Brine
In a medium saucepan, combine the water, white vinegar, sugar, and sea salt. If you’re feeling a little adventurous and want a touch of heat, this is where you’d add your red pepper flakes now. I love a subtle warmth, so I usually opt for about 1/4 teaspoon. Whisk everything together to ensure the sugar and salt are well dissolved. Place the saucepan over medium heat. We want to bring this mixture to a simmer, not a rolling boil. Stir occasionally as it heats up. The goal is to dissolve all the solids and create a fragrant, steamy liquid that will work its magic on the onions. It should smell slightly sweet and vinegary, a promising aroma of what’s to come.
3. Combining Onions and Brine
Once the brine is simmering gently and everything is dissolved, it’s time to bring the onions and brine together. You can do this in one of two ways, depending on your preference for the onion’s final texture. For a softer, more deeply infused pickle, pour the hot brine directly over the thinly sliced red onions in a heatproof bowl or a large jar. For a crisper pickle, you can add the sliced onions to the simmering brine in the saucepan, letting them cook for just 1-2 minutes before transferring them and the brine to your storage jar. I typically go for the direct pour method as I enjoy a bit more crunch in my pickled onions.
4. Packing and Cooling
Now, carefully transfer the onions and the hot brine into a clean, airtight jar. A mason jar is perfect for this. Make sure the onions are completely submerged in the brine. If they’re not, you can gently press them down with a spoon. Leave about a 1/2 inch of headspace at the top of the jar. Once the jar is filled and senon-alcoholic aled tightly, allow it to cool down at room temperature. This cooling period is crucial because it allows the onions to continue to soften and absorb the flavors of the brine as the temperature gradually drops. Resist the urge to refrigerate them immediately; letting them cool on the counter allows for a more even pickling process.
5. Chilling and Enjoying
After the jar has cooled completely to room temperature (this usually takes a couple of hours), it’s time to transfer it to the refrigerator. You’ll notice the onions starting to turn a beautiful, translucent pink as they sit in the brine. For the best flavor, I recommend letting them chill for at least 30 minutes to an hour before using them. However, they really reach their peak flavor after a few hours, or even overnight. The longer they sit, the more the flavors meld and deepen. You’ll find that these pickled red onions will keep in the refrigerator for several weeks, making them a fantastic staple to have on hand. They are perfect on everything from burgers and tacos to salads and grain bowls. Get ready to impress yourself and your guests with this simple yet incredibly impactful addition to your culinary repertoire!
Conclusion:
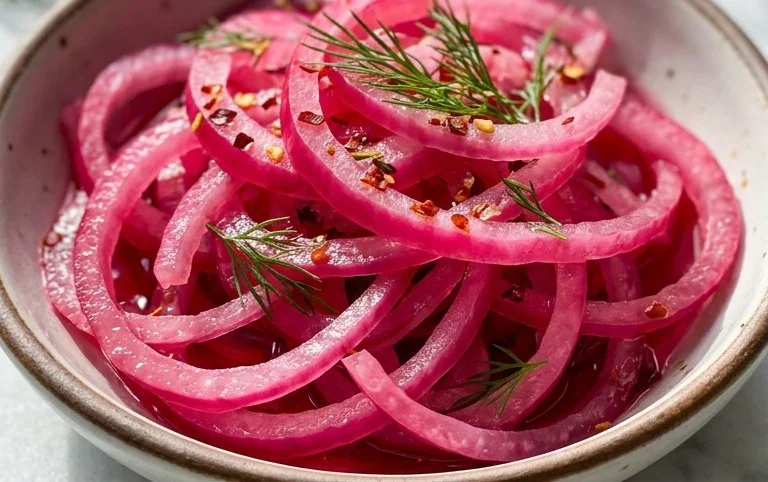
There you have it – the ultimate guide to making your own stunningly vibrant and incredibly versatile pickled red onions! This recipe truly is a game-changer in the kitchen. The simple combination of red onions, vinegar, sugar, and salt transforms a humble ingredient into a culinary powerhouse. Not only do these pickled red onions add a delightful tangy crunch and beautiful pop of color to any dish, but they also elevate everyday meals to something truly special. I’ve found myself reaching for them constantly, from topping tacos and sandwiches to jazzing up salads and charcuterie boards.
Don’t be afraid to get creative with serving suggestions! They are perfect alongside grilled meats, rich stews, hearty burgers, and even as a zesty addition to avocado toast. For variations, consider infusing your brine with peppercorns, bay leaves, or even a pinch of chili flakes for a little heat. This quick pickling process is so forgiving, and the results are consistently delicious. I wholeheartedly encourage you to give this recipe a try – you won’t regret adding this tangy treasure to your culinary repertoire!
Frequently Asked Questions:
How long do pickled red onions last?
When stored in an airtight container in the refrigerator, your pickled red onions should remain fresh and flavorful for at least 2 to 3 weeks. The longer they sit, the more the flavors will meld and deepen, so don’t hesitate to enjoy them over time.
Can I use a different type of vinegar?
Absolutely! While apple cider vinegar or white grape juice vinegar are excellent choices for their balanced acidity, you can experiment with others like red grape juice vinegar for an even deeper red hue and more robust flavor. Just be mindful that the flavor profile will change slightly with different vinegars.
My pickled red onions aren’t very crunchy. What did I do wrong?
For maximum crunch, ensure your red onions are thinly sliced. Also, make sure to pour the hot brine over the onions immediately after it’s prepared. Letting the onions sit in the hot brine for a few minutes before refrigerating helps to “cook” them slightly while preserving their crispness.
Pickled Red Onions
Quick and easy pickled red onions, perfect for adding a tangy crunch to salads, sandwiches, tacos, and more.
Ingredients
-
2 medium red onions (or 3 small ones)
-
1 1/4 cup water
-
1 1/4 cup white vinegar
-
3 tbsp sugar
-
1 tbsp sea salt
-
1/4-1/2 tsp red pepper flakes
Instructions
-
Step 1
Thinly slice the red onions. -
Step 2
Pack the sliced onions into a clean glass jar. -
Step 3
In a small saucepan, combine water, white vinegar, sugar, and sea salt. Heat over medium heat, stirring until sugar and salt are dissolved. Do not boil. -
Step 4
If using, stir in the red pepper flakes. -
Step 5
Pour the hot brine over the onions in the jar, ensuring they are fully submerged. -
Step 6
Let the jar cool to room temperature, then seal and refrigerate. Onions will be ready to eat in about 30 minutes, but are best after a few hours.
Important Information
Nutrition Facts (Per Serving)
It is important to consider this information as approximate and not to use it as definitive health advice.
Allergy Information
Please check ingredients for potential allergens and consult a health professional if in doubt.