Cheesy Garlic Chicken Wraps – Easy Weeknight Dinner
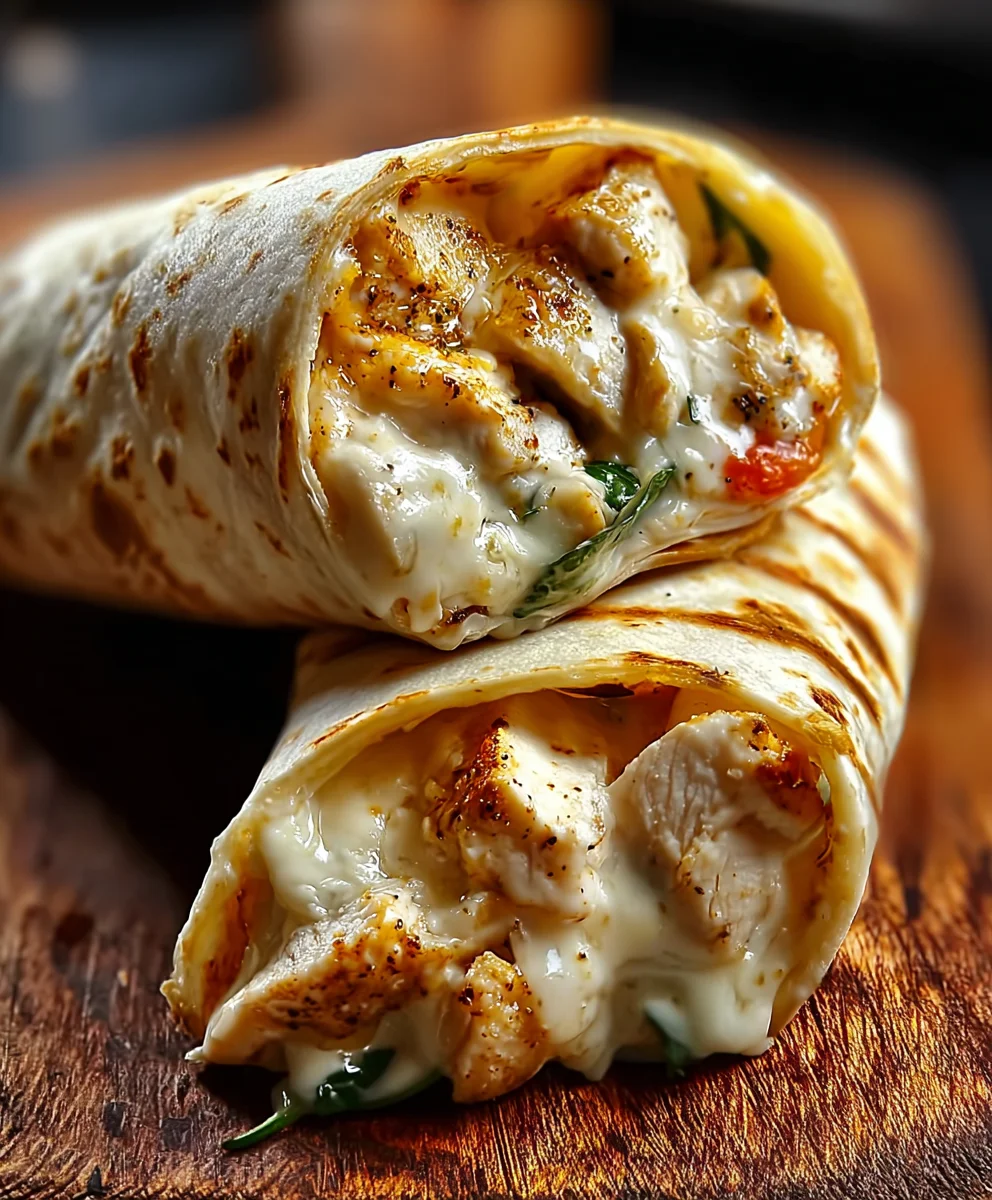
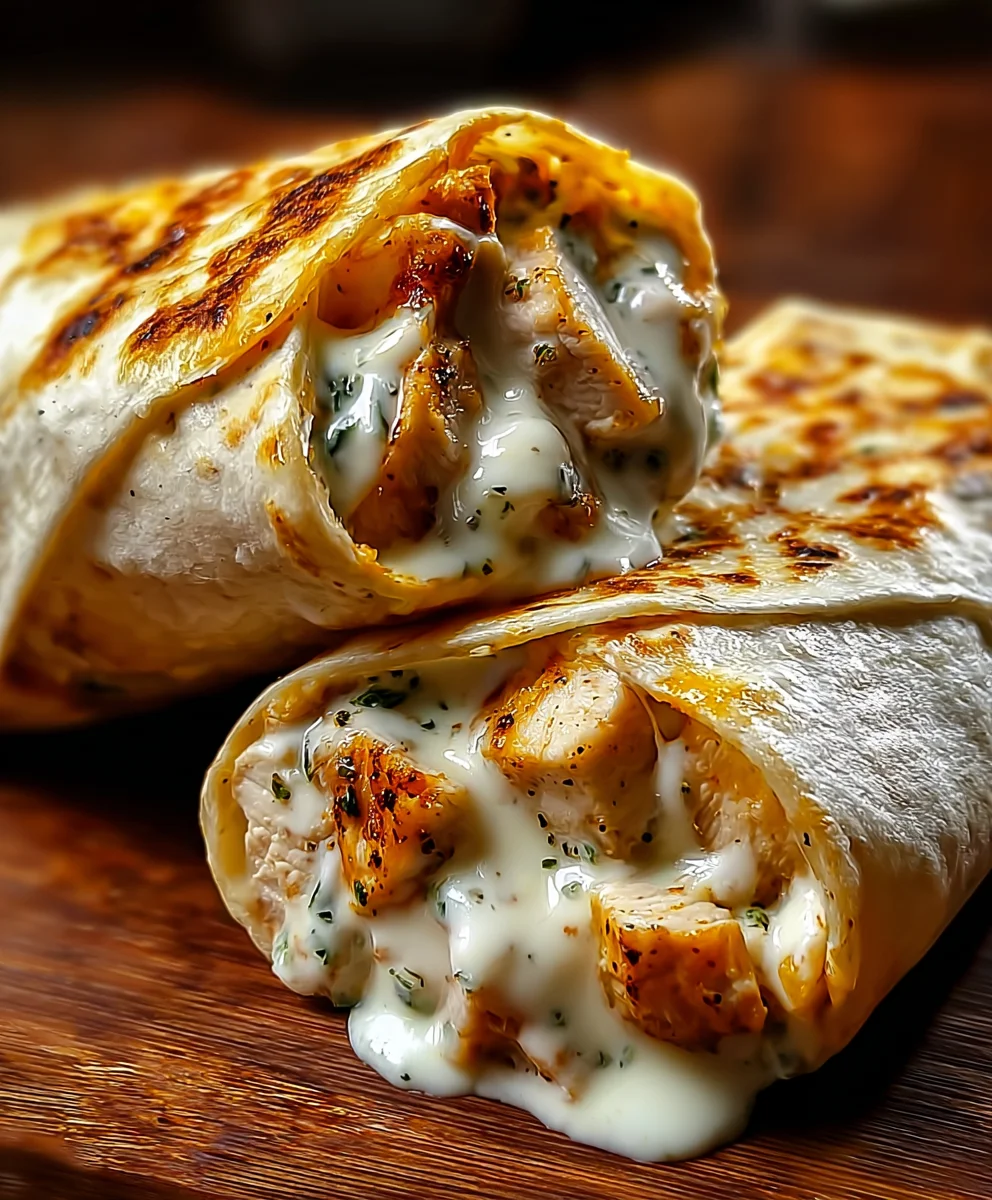
Cheesy Garlic Chicken Wraps are more than just a meal; they’re a symphony of savory, creamy, and utterly satisfying flavors that will have you rethinking your weeknight dinner routine. Have you ever craved something that’s both comforting and exciting, a dish that delivers that perfect balance of simple preparation and knockout taste? That’s precisely what these Cheesy Garlic Chicken Wraps offer. People adore them because they manage to be incredibly familiar yet delightfully elevated, hitting all the right notes. The magic truly lies in the tender, garlicky chicken that’s generously coated in a luscious, melted cheese sauce, all cradled within a soft, warm tortilla. It’s the ultimate handheld comfort food, a testament to how a few key ingredients can come together to create something truly unforgettable.
Ingredients:
- 2 cups cooked chicken (shredded or diced)
- 1 ½ cups shredded mozzarella or cheddar cheese (or a blend of both!)
- ¼ cup cream cheese, softened
- 2 tbsp butter, melted
- 3 cloves garlic, minced
- ¼ cup sour cream
- 1 tsp garlic powder
- 1 tsp Italian seasoning
- 4 large tortillas (burrito-size work best)
- Salt and pepper, to taste
- Fresh parsley, chopped (for garnish, optional)
Preparing the Cheesy Garlic Chicken Filling
Step 1: Sautéing the Garlic
Let’s start by building a fantastic flavor base for our cheesy garlic chicken wraps. In a medium skillet, melt the 2 tablespoons of butter over medium heat. Once the butter is shimmering and fragrant, add your minced garlic. We want to gently sauté this for about 1 to 2 minutes, stirring constantly. The goal here is to release the aromatic oils from the garlic without letting it brown or burn. Burnt garlic can turn bitter, which is definitely not what we’re aiming for! You’ll know it’s ready when you can smell its wonderful aroma filling your kitchen. This quick sauté really amplifies the garlic’s flavor, making it more robust and enjoyable in the final dish.
Step 2: Combining the Filling Ingredients
Once the garlic is beautifully fragrant, it’s time to bring in the rest of our filling components. Add the 2 cups of cooked chicken directly into the skillet with the sautéed garlic and melted butter. Now, gently stir in the softened ¼ cup of cream cheese. The residual heat from the skillet and the butter will help the cream cheese melt and become wonderfully creamy, coating the chicken. Next, add the ¼ cup of sour cream. This adds another layer of tangin extractess and moisture, ensuring our filling isn’t dry. Stir everything together until the cream cheese is fully melted and the chicken is well-coated with the creamy mixture.
Step 3: Seasoning the Filling to Perfection
Now comes the part where we season our chicken filling to make it truly irresistible. Sprinkle in the 1 teaspoon of garlic powder for an extra punch of garlic flavor that complements the fresh garlic we sautéed. Add the 1 teaspoon of Italian seasoning, which will bring a lovely blend of herbs like oregano, basil, and thyme to the mix, enhancing the overall savory profile. Season generously with salt and pepper to your taste. Remember, you can always add more salt and pepper later, so start with a good amount and adjust as needed. Stir everything together thoroughly to ensure the seasonings are evenly distributed throughout the chicken mixture. This step is crucial for developing a balanced and delicious flavor.
Step 4: Melting the Cheese and Finishing the Filling
The moment we’ve all been waiting for – the cheese! Sprinkle the 1 ½ cups of shredded mozzarella or cheddar cheese (or your favorite combination!) over the chicken mixture in the skillet. Turn the heat down to low. Cover the skillet with a lid and let it cook for about 3 to 5 minutes, or until the cheese is completely melted and gloriously gooey. The steam trapped under the lid will help melt the cheese evenly without overcooking the chicken. Occasionally, you might want to gently stir the mixture towards the end to prevent any sticking and to ensure the cheese is melted into every nook and cranny. A perfectly melted cheese pull is what we’re after! Once the cheese is fully melted, remove the skillet from the heat.
Assembling and Cooking the Wraps
Step 5: Assembling and Grilling the Cheesy Garlic Chicken Wraps
Now it’s time to assemble our delicious wraps. Lay out your 4 large tortillas on a clean, flat surface. Divide the cheesy chicken filling evenly among the four tortillas, spooning it into the center of each one. Be generous, but don’t overfill them to the point where they become difficult to wrap. Fold in the sides of each tortilla first, then tightly roll them up from the bottom, tucking in the filling as you go. To get a lovely golden-brown crisp on the outside and to further melt the cheese inside, we’ll grill them. You can do this in a lightly oiled skillet over medium heat for about 3-4 minutes per side, or until the tortillas are golden brown and slightly crispy. Alternatively, you can use a panini press or a grill pan. The goal is to heat everything through and get a satisfying texture.
Step 6: Serving Your Cheesy Garlic Chicken Wraps
Once your wraps are beautifully golden and heated through, carefully remove them from the skillet or grill. For an extra touch of freshness and visual appeal, you can sprinkle a little chopped fresh parsley over the top as a garnish. This is entirely optional, but it does add a nice bit of color and a subtle herbaceous note. Serve these Cheesy Garlic Chicken Wraps immediately while they are hot and the cheese is still wonderfully melty and gooey. They make a fantastic lunch, a quick dinner, or even a satisfying snack. Enjoy the incredibly satisfying combination of tender chicken, creamy cheese, and aromatic garlic all wrapped up in a warm tortilla!
Conclusion:
There you have it – a simple yet incredibly satisfying recipe for Cheesy Garlic Chicken Wraps! This dish is a weeknight savior, offering a delightful combination of tender chicken, pungent garlic, and gooey melted cheese, all bundled up in a convenient wrap. I hope you’ve enjoyed learning how to whip up these delicious wraps and that they become a regular in your meal rotation. They are perfect for a quick lunch, a casual dinner, or even for feeding a crowd. Don’t hesitate to get creative with your fillings – the possibilities are truly endless!
For serving suggestions, these Cheesy Garlic Chicken Wraps are fantastic on their own, but they also pair beautifully with a side of crisp coleslaw, a fresh green salad, or even some sweet potato fries. When it comes to variations, feel free to experiment! You can swap out the chicken for shredded beef or even firm tofu for a vegetarian option. Add some sautéed bell peppers and onions for extra flavor and texture, or a drizzle of sriracha mayo for a spicy kick. The most important thing is to have fun and make them your own!
Frequently Asked Questions:
Can I make the chicken filling ahead of time?
Absolutely! The cooked chicken and garlic mixture can be prepared up to two days in advance and stored in an airtight container in the refrigerator. Simply reheat it gently before assembling your wraps for the freshest taste.
What kind of cheese works best for Cheesy Garlic Chicken Wraps?
While cheddar is a fantastic choice for its melting properties and classic flavor, you can also explore other cheeses! Monterey Jack, mozzarella, or a blend of your favorite melting cheeses will all work wonderfully to achieve that irresistible cheesy pull.
Are there any healthier alternatives to the tortilla wraps?
Yes, there are! For a lighter option, consider using large lettuce leaves (like romaine or butter lettuce) as a wrap. Whole wheat tortillas or gluten-free wraps are also excellent choices if you have dietary restrictions.
Cheesy Garlic Chicken Wraps – Easy Weeknight Dinner
Delicious and easy weeknight dinner wraps filled with cheesy garlic chicken.
Ingredients
-
2 cups cooked chicken (shredded or diced)
-
1 ½ cups shredded mozzarella or cheddar cheese
-
¼ cup cream cheese, softened
-
2 tbsp butter, melted
-
3 cloves garlic, minced
-
¼ cup sour cream
-
1 tsp garlic powder
-
1 tsp Italian seasoning
-
4 large tortillas
-
Salt and pepper, to taste
-
Fresh parsley, chopped (for garnish, optional)
Instructions
-
Step 1
In a medium skillet, melt the 2 tablespoons of butter over medium heat. Add minced garlic and sauté for 1 to 2 minutes until fragrant, stirring constantly. Do not let it brown. -
Step 2
Add the cooked chicken to the skillet with the sautéed garlic and butter. Stir in the softened cream cheese and sour cream until the chicken is well-coated and the cream cheese is melted. -
Step 3
Season the chicken mixture with garlic powder, Italian seasoning, salt, and pepper. Stir well to distribute the seasonings evenly. -
Step 4
Sprinkle the shredded cheese over the chicken mixture. Turn the heat down to low, cover the skillet, and cook for 3 to 5 minutes, or until the cheese is completely melted and gooey. Stir gently towards the end to prevent sticking. -
Step 5
Lay out the tortillas. Divide the cheesy chicken filling evenly among them, spooning it into the center. Fold in the sides of each tortilla, then tightly roll them up from the bottom. -
Step 6
Grill the wraps in a lightly oiled skillet over medium heat for about 3-4 minutes per side, or until golden brown and slightly crispy. Alternatively, use a panini press or grill pan. -
Step 7
Serve the Cheesy Garlic Chicken Wraps immediately. Garnish with fresh parsley, if desired. Enjoy while hot and gooey!
Important Information
Nutrition Facts (Per Serving)
It is important to consider this information as approximate and not to use it as definitive health advice.
Allergy Information
Please check ingredients for potential allergens and consult a health professional if in doubt.