Frozen Greek Yogurt Peanut Butter Bites-Easy Homemade Treat
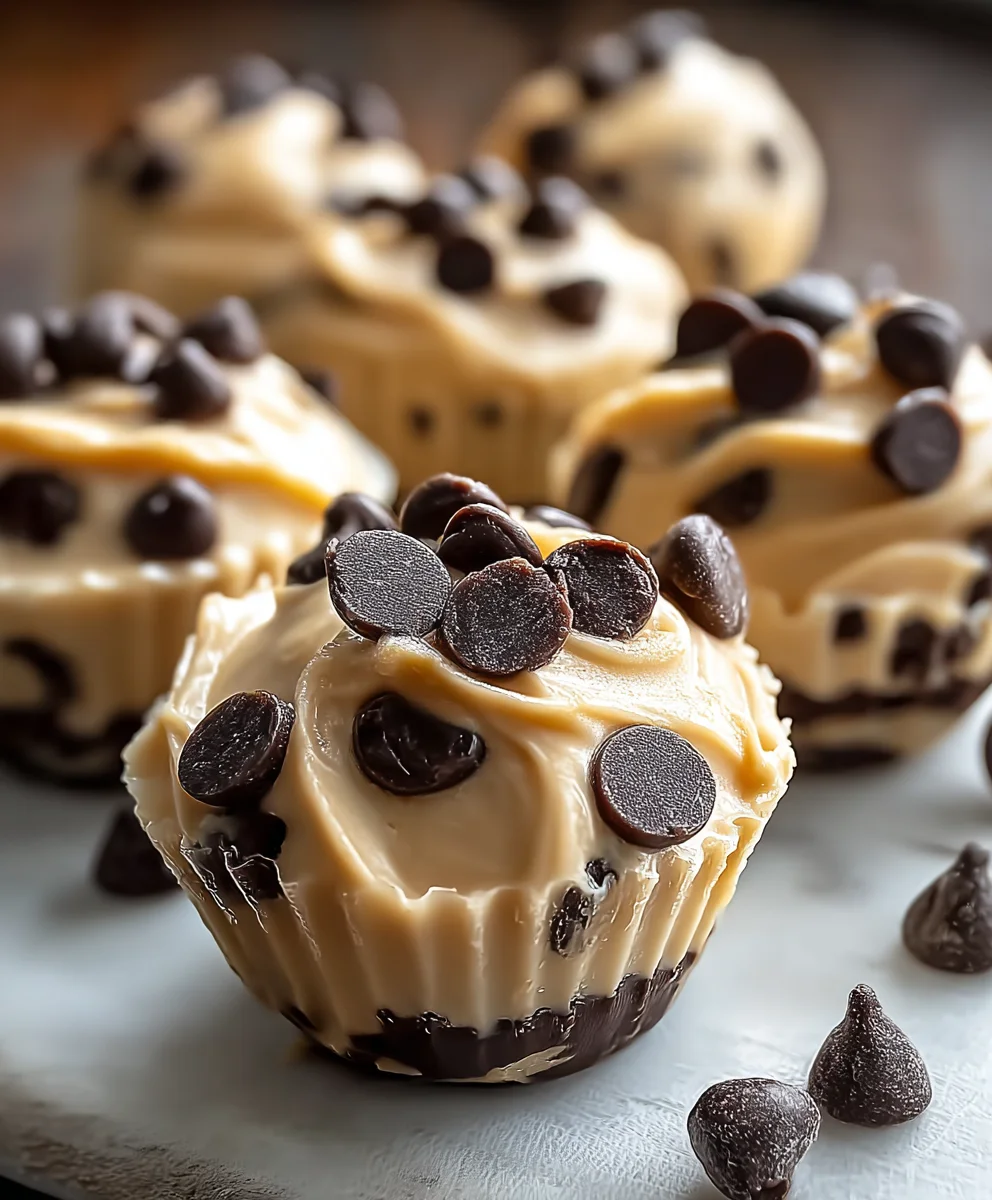
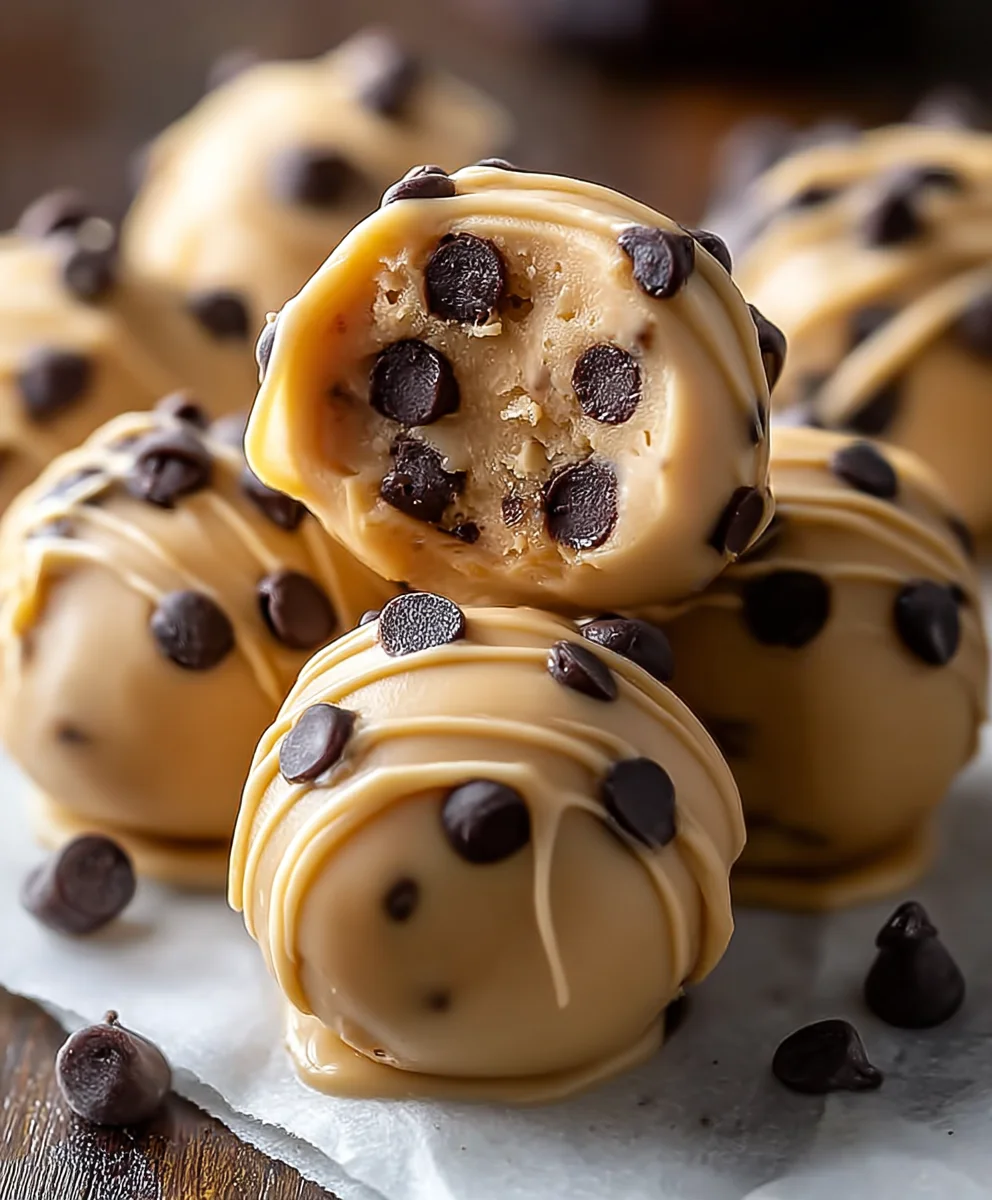
Frozen Greek Yogurt Peanut Butter Bites with Chocolate Chips: A Delightful Treat You Can Make at Home! Are you searching for a guilt-free indulgence that satisfies your sweet tooth and provides a welcome nutritional boost? Look no further than these incredible frozen delights. We all know the struggle of resisting sugary snacks, but these bites offer a fantastic alternative. People adore them because they strike that perfect balance between creamy, cool refreshment and rich, satisfying flavors. The tang of Greek yogurt, the nutty depth of peanut butter, and the sweet bursts of chocolate chips create a symphony of taste that’s simply irresistible. What truly sets these Frozen Greek Yogurt Peanut Butter Bites with Chocolate Chips apart is their incredible versatility and ease of preparation. They’re the ultimate make-ahead snack, perfect for a quick breakfast, a post-workout reward, or a healthier dessert option. You’ll be amazed at how simple it is to transform a few wholesome ingredients into a frozen masterpiece that will have everyone asking for the recipe.
Ingredients:
- 1 cup plain Greek yogurt
- 1/2 cup creamy peanut butter
- 1/4 cup honey
- 1 teaspoon vanilla extract
- 1/2 cup mini chocolate chips
- 1/4 teaspoon sea salt
Preparation Steps
Step 1: Combining the Base Ingredients
The first crucial step in creating these delightful frozen yogurt bites is to prepare the creamy, flavorful base. In a medium-sized mixing bowl, add the 1 cup of plain Greek yogurt. Ensure your Greek yogurt is full-fat for the creamiest texture and richest flavor, though any plain variety will work. Next, measure out your 1/2 cup of creamy peanut butter. For the best results, use a smooth, unsweetened peanut butter. This will prevent the bites from becoming overly sweet and allow the honey’s natural sweetness to shine. Spoon the peanut butter directly into the bowl with the Greek yogurt. Now, it’s time to add the sweetness. Measure 1/4 cup of honey. Raw or local honey will offer a more complex flavor profile, but any liquid honey will do. Finally, add 1 teaspoon of pure vanilla extract. This little addition enhances all the other flavors and adds a warm, aromatic note.
Step 2: Thoroughly Mixing and Incorporating Flavors
Once all your base ingredients are in the bowl – the Greek yogurt, peanut butter, honey, and vanilla extract – it’s time to blend them together. Use a whisk or a sturdy spoon to mix everything until it’s completely smooth and homogenous. You want to ensure there are no streaks of yogurt or peanut butter remaining. This thorough mixing is essential because it distributes the flavors evenly and creates a uniform consistency. If your peanut butter is particularly stiff, you might need to stir a little more vigorously. A good tip here is to gently warm the peanut butter for about 10-15 seconds in the microwave before adding it. This will make it much easier to mix into the yogurt. Continue stirring until the mixture is lump-free and has a creamy, swirl-like appearance. This is where the magic starts to happen, transforming simple ingredients into something special.
Step 3: Adding the Texture and Finishing Touches
With your creamy base perfectly blended, it’s time to introduce the delightful textural elements and final flavor enhancements. Gently fold in the 1/2 cup of mini chocolate chips. Using mini chips is ideal because they distribute more evenly throughout the mixture and create little bursts of chocolatey goodness in every bite. If you only have regular-sized chocolate chips, you can chop them into smaller pieces for a more consistent distribution. Next, add the 1/4 teaspoon of sea salt. The sea salt is a secret weapon in this recipe; it doesn’t make the bites taste salty, but rather it brilliantly enhances the sweetness of the honey and the richness of the peanut butter, creating a more complex and satisfying flavor profile. Stir gently to incorporate the chocolate chips and sea salt without overmixing, which could cause the chocolate to melt or break down too much. You want to see those little chocolate gems suspended in the peanut butter yogurt mixture.
Step 4: Portioning and Freezing the Bites
Now that your flavorful mixture is ready, it’s time to shape these into bite-sized treats. You have a couple of excellent options for this. The easiest method is to use a mini muffin tin lined with mini paper liners. This makes for incredibly easy removal once frozen and keeps the bites perfectly shaped. Simply spoon about 1 to 2 tablespoons of the mixture into each liner, filling them about three-quarters of the way full. Alternatively, you can line a baking sheet with parchment paper or a silicone baking mat. Then, use a small spoon or a piping bag filled with the mixture to create small dollops directly onto the prepared sheet. Aim for a size that’s easy to pop into your mouth in one or two bites. Once portioned, carefully transfer the baking sheet or muffin tin to your freezer. Allow them to freeze for at least 2 to 3 hours, or until they are completely firm and solid. The freezing process is what transforms the creamy mixture into delightful, firm frozen yogurt bites.
Step 5: Storing and Enjoying Your Homemade Treats
After your frozen yogurt bites have achieved a solid consistency, it’s time to store them so you can enjoy them whenever a craving strikes. Once they are fully frozen and firm, carefully remove them from the muffin tin liners or the parchment-lined baking sheet. Transfer the frozen bites to an airtight container. You can layer them between sheets of parchment paper to prevent them from sticking together, especially if you’ve made a large batch. Store these delicious treats in your freezer. They will keep well for up to 1 month, though they are best enjoyed within the first few weeks for optimal texture. To serve, simply take out as many bites as you desire. They are perfect for a healthy-ish dessert, a post-workout snack, or even a sweet treat to share with friends and family. The combination of creamy yogurt, savory peanut butter, sweet honey, and rich chocolate chips makes these a truly irresistible homemade delight.
Conclusion:
There you have it! The “Frozen Greek Yogurt Peanut Butter Bites with Chocolate Chips: A Delightful Treat You Can Make at Home!” are more than just a recipe; they’re an invitation to a moment of pure, unadulterated joy. These little gems are incredibly simple to whip up, making them perfect for a quick dessert, a post-workout snack, or even a healthier treat for the kids. Their creamy, tangy yogurt base, balanced by the richness of peanut butter and the sweet burst of chocolate chips, creates a flavor profile that’s simply irresistible. I encourage you to try making them yourself and experience the satisfaction of creating such a delicious and relatively healthy treat from scratch. They are wonderful on their own, but also fantastic served alongside fresh berries or a drizzle of honey for an extra touch of elegance.
Want to customize these bites? Feel free to experiment with different nut butters like almond or cashew, or swap out the chocolate chips for a handful of chopped nuts or dried fruit. The possibilities are truly endless!
Frequently Asked Questions:
Can I make these Frozen Greek Yogurt Peanut Butter Bites with Chocolate Chips ahead of time?
Absolutely! In fact, these bites are designed to be made ahead. Once frozen, they can be stored in an airtight container in your freezer for up to 2-3 weeks, making them a perfect make-ahead treat for those inevitable sweet cravings.
What if I don’t have plain Greek yogurt? Can I use another type?
While plain Greek yogurt provides the best texture and a good balance of tartness and protein, you can experiment with other thick yogurts. However, be mindful that less thick yogurts might result in a softer bite. You can also try draining regular yogurt to make it thicker before using it in this recipe for “Frozen Greek Yogurt Peanut Butter Bites with Chocolate Chips.”
Frozen Greek Yogurt Peanut Butter Bites
Easy homemade frozen Greek yogurt peanut butter bites with chocolate chips and honey.
Ingredients
-
1 cup plain Greek yogurt
-
1/2 cup creamy peanut butter
-
1/4 cup honey
-
1 teaspoon vanilla extract
-
1/2 cup mini chocolate chips
-
1/4 teaspoon sea salt
Instructions
-
Step 1
In a medium bowl, combine Greek yogurt, creamy peanut butter, honey, and vanilla extract. Ensure Greek yogurt is full-fat for best texture. -
Step 2
Whisk or stir until the mixture is completely smooth and homogenous. If peanut butter is stiff, gently warm it for 10-15 seconds in the microwave. -
Step 3
Gently fold in mini chocolate chips and sea salt. The sea salt enhances sweetness and peanut butter richness. -
Step 4
Portion the mixture into a mini muffin tin lined with paper liners, filling about three-quarters full. Alternatively, pipe or spoon dollops onto a parchment-lined baking sheet. -
Step 5
Freeze for at least 2 to 3 hours, or until firm and solid. -
Step 6
Once frozen solid, transfer to an airtight container and store in the freezer for up to 1 month. Enjoy as a healthy-ish dessert or snack.
Important Information
Nutrition Facts (Per Serving)
It is important to consider this information as approximate and not to use it as definitive health advice.
Allergy Information
Please check ingredients for potential allergens and consult a health professional if in doubt.