Easy Chocolate Swiss Roll- Delicious & Simple Dessert
Easy Chocolate Swiss Roll recipes are an absolute game-changer for anyone who adores that melt-in-your-mouth, decadent chocolate experience but perhaps shies away from more complex baking. There’s a certain magic to a perfectly rolled Swiss roll, isn’t there? That soft, impossibly tender sponge cake encasing a luscious, creamy filling, all dusted with a whisper of cocoa or a drizzle of rich ganache. It’s a dessert that looks incredibly impressive, yet I’m here to tell you that an easy Chocolate Swiss Roll is entirely achievable, even for baking novices. Forget those intimidating pastry classes; this recipe demystifies the process, proving that sophisticated-looking treats don’t need to be complicated. What makes this particular easy Chocolate Swiss Roll so special is its sheer accessibility and guaranteed deliciousness. It’s the perfect balance of sweet, rich chocolate and airy cake, making it ideal for special occasions, impromptu celebrations, or simply satisfying a serious chocolate craving. Get ready to impress yourself and everyone you share it with!
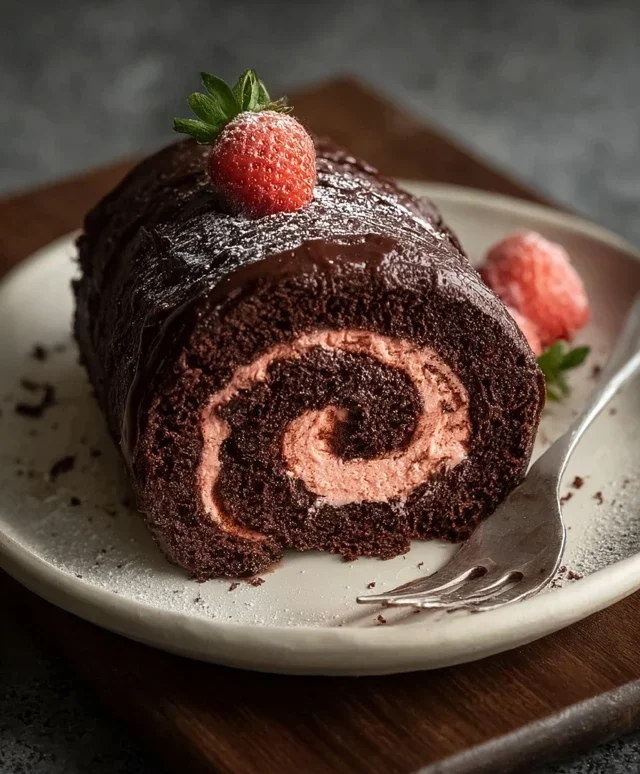
Easy Chocolate Swiss Roll
Welcome to your new favorite dessert! This Easy Chocolate Swiss Roll is surprisingly simple to make, even if you’re new to the world of Swiss rolls. It’s moist, decadent, and perfectly chocolatey, with a creamy, fruity filling that balances the rich cake beautifully. We’re going to make this completely dairy-free and use wholesome ingredients for a treat that everyone can enjoy. Get ready to impress yourself and your loved ones with this stunning, yet approachable, dessert.
Ingredients:
Instructions:
Let’s get started on this delightful chocolate creation!
Making the Chocolate Cake Batter
First, we need to prepare our dry ingredients for the cake. In a medium bowl, whisk together the oat flour, cassava flour, 30g of cocoa powder, arrowroot starch, baking powder, and baking soda. Whisking thoroughly ensures that all the leavening agents and starches are evenly distributed, which is crucial for a light and airy cake. Set this aside for now. In a separate, larger bowl, combine the room-temperature aquafaba and 100g of your chosen sugar. Using an electric mixer, whisk this mixture on high speed until stiff peaks form. This process can take several minutes, similar to whipping egg whites. The aquafaba will become glossy and voluminous, creating the structure for our cake. Once you have stiff peaks, gently fold in the unsweetened applesauce and the unsweetened dairy-free yogurt until just combined. Be careful not to overmix at this stage, as we want to maintain the airiness we’ve created.
Now, it’s time to combine the wet and dry ingredients. Gradually add the dry ingredient mixture to the wet ingredients, folding gently with a spatula until just combined. Again, overmixing can lead to a dense cake, so stop as soon as you no longer see streaks of dry flour. The batter should be smooth and pourable.
Baking the Cake
Preheat your oven to 175°C (350°F). Line a 10×15 inch (25×38 cm) jelly roll pan or baking sheet with parchment paper. Grease the parchment paper lightly. This step is essential to prevent the cake from sticking. Next, take a clean kitchen towel (preferably a tea towel) and lay it flat. Sprinkle this towel generously with the 2 tbsp of cocoa powder. This will be used to help us roll the cake without it cracking.
Pour the chocolate cake batter evenly into the prepared pan, spreading it smoothly to the edges. Bake in the preheated oven for 12-15 minutes, or until a toothpick inserted into the center comes out clean. The cake should be springy to the touch but not browned or dry.
Rolling and Cooling the Cake
As soon as the cake is out of the oven, carefully invert it onto the cocoa-dusted kitchen towel. Gently peel off the parchment paper. Starting from one of the shorter ends, carefully roll the warm cake and the towel together. The warmth of the cake makes it pliable and less likely to crack. Let the rolled cake cool completely on a wire rack, still in its towel, to maintain its rolled shape.
Making the Creamy Strawberry Filling
While the cake is cooling, let’s prepare the luscious filling. In a medium bowl, beat the room-temperature vegan butter until light and fluffy. If you’re using full-fat canned coconut cream, make sure it’s been chilled overnight. Scoop out the solidified coconut cream from the top of the can, discarding the water. Add this coconut fat to the vegan butter and beat until well combined and fluffy. You want a smooth, creamy consistency. Gradually add the remaining 100g of sugar and the pulsed freeze-dried strawberries (which will act as a natural thickener and flavor enhancer) to the butter mixture. Beat until everything is thoroughly incorporated and the frosting is light and airy.
Assembling the Swiss Roll
Once the cake has cooled completely, carefully unroll it. You should have a beautifully baked, moist chocolate sponge. Spread the prepared creamy strawberry filling evenly over the entire surface of the cake, leaving a small border around the edges. Don’t overload it, or it will squeeze out when you roll it up.
Now, starting from the same short end you used for rolling the warm cake, carefully and tightly roll the cake back up, this time without the towel. You might need to gently guide it to ensure a neat roll. Place the rolled Swiss roll seam-side down on a serving platter. If the ends look a bit messy, you can gently trim them with a sharp knife for a cleaner presentation.
Finishing Touches and Serving
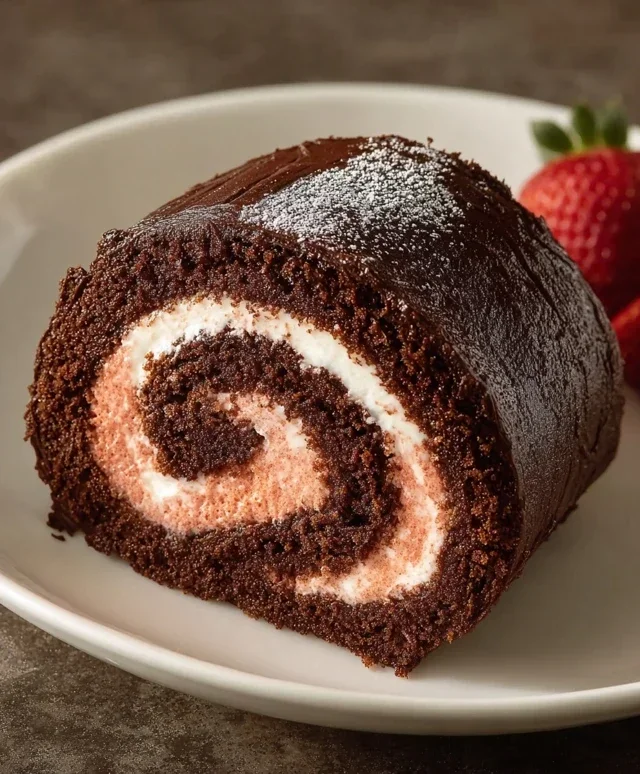
For an extra touch of elegance, you can dust the top of the Swiss roll with a little extra cocoa powder or confectioners’ sugar, if you have some on hand (though not listed in the primary ingredients). Garnish the finished roll with the fresh sliced strawberries. For the best flavor and texture, I recommend chilling the Swiss roll in the refrigerator for at least 30 minutes before slicing and serving. This allows the filling to set and the flavors to meld together beautifully. Slice it into thick pieces with a sharp knife, and enjoy this delightful homemade treat!
Conclusion:
And there you have it – your guide to creating a stunning and absolutely delicious Chocolate Swiss Roll! I truly believe this recipe is fantastic because it proves that elegant desserts don’t need to be complicated. The combination of a light, airy chocolate sponge and a rich, creamy filling is simply divine, and the satisfaction of rolling it yourself is incredibly rewarding. This Easy Chocolate Swiss Roll is perfect for birthdays, special occasions, or simply as a delightful treat to brighten any day. Don’t be intimidated by the rolling process; practice makes perfect, and even if your first roll isn’t flawless, it will still taste amazing!
For serving, a dusting of powdered sugar is classic, but you could also drizzle it with extra chocolate ganache or serve it with fresh berries and a dollop of whipped cream for an extra touch of indulgence. If you’re feeling adventurous, consider variations like adding a hint of espresso powder to the sponge for a mocha twist, or swapping the chocolate filling for a raspberry cream cheese frosting.
I wholeheartedly encourage you to give this Easy Chocolate Swiss Roll a try. It’s a fantastic way to impress your friends and family, or simply to treat yourself to something truly special. You’ve got this!
Frequently Asked Questions
Q: My Swiss roll cracked when I tried to roll it. What did I do wrong?
Don’t worry, cracking is a common issue! It often happens if the sponge is overbaked, making it too dry, or if it cools completely before rolling. Try to roll it while it’s still warm and slightly pliable. Also, ensure you’re not rolling it too tightly, and consider scoring the edges lightly with a knife before you begin extract the roll.
Q: Can I make the chocolate sponge ahead of time?
Yes, you can bake the sponge and let it cool completely. Wrap it tightly in plastic wrap and store it at room temperature for up to 24 hours. It’s actually sometimes easier to roll when it has cooled a bit. Just make sure it’s fully cooled before adding your filling and rolling.
Easy Chocolate Swiss Roll
A simple and delicious dairy-free and gluten-free chocolate swiss roll recipe.
Ingredients
-
135 g oat flour
-
30 g cassava flour
-
30 g cocoa powder
-
1 tbsp arrowroot starch
-
1 1/2 tsp baking powder
-
1/2 tsp baking soda
-
122 mL aquafaba, room temperature
-
200 g organic granulated sugar or coconut sugar, divided
-
100 g unsweetened applesauce, room temperature
-
60 g unsweetened dairy free yogurt, room temperature
-
2 tbsp cocoa powder for dusting the dish towel
-
1 cup sliced strawberries, for garnish
-
226 g vegan butter, room temperature
-
70 g freeze dried strawberries, pulsed into a flour
-
Coconut fat from 1 can full-fat coconut cream
Instructions
-
Step 1
Preheat oven to 350°F (175°C). Line a 10×15 inch baking pan with parchment paper. Dust a clean kitchen towel with 2 tbsp cocoa powder. -
Step 2
In a large bowl, whisk together oat flour, cassava flour, 30g cocoa powder, arrowroot starch, baking powder, and baking soda. -
Step 3
In a separate bowl, whip aquafaba until foamy. Gradually add 100g of the sugar and continue whipping until stiff peaks form. -
Step 4
Gently fold the applesauce and dairy-free yogurt into the dry ingredients. Then, fold this mixture into the whipped aquafaba until just combined. Do not overmix. -
Step 5
Pour batter into the prepared baking pan and spread evenly. Bake for 12-15 minutes, or until a toothpick inserted into the center comes out clean. -
Step 6
Immediately invert the cake onto the prepared cocoa-dusted towel. Carefully peel off the parchment paper. Let it cool completely. -
Step 7
While the cake cools, prepare the frosting. Beat vegan butter until creamy. Gradually add the remaining 100g sugar, pulsed freeze-dried strawberries, and coconut cream fat until smooth and fluffy. -
Step 8
Spread the frosting evenly over the cooled cake, leaving a small border. Arrange sliced strawberries over the frosting. Tightly roll the cake using the towel to guide it. Chill for at least 30 minutes before slicing.
Important Information
Nutrition Facts (Per Serving)
It is important to consider this information as approximate and not to use it as definitive health advice.
Allergy Information
Please check ingredients for potential allergens and consult a health professional if in doubt.