Easy Mini Apple Pies – Quick & Delicious Dessert
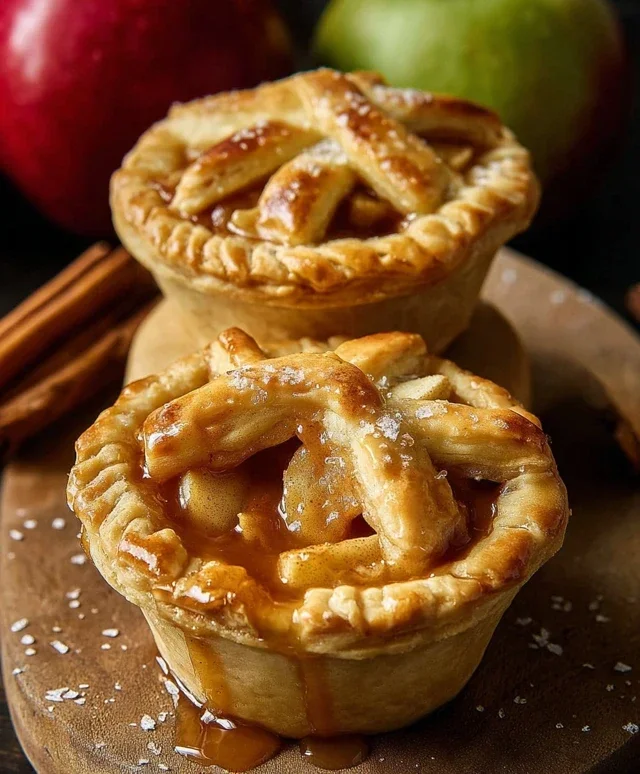
Mini Apple Pies are pure, portable perfection! There’s something undeniably charming about these little hand pies, and they’ve always held a special place in my heart. Who can resist the warm, spiced apple filling encased in a flaky, buttery crust? These are the kind of treats that instantly transport you to cozy autumn days, even when it’s the middle of summer. They’re perfect for sharing (or not!), delightful for picnics, and make an absolutely adorable addition to any dessert table. What truly makes these mini apple pies so special is their miniature size. Each one is a perfectly portioned indulgence, meaning you can enjoy that classic apple pie flavor without committing to a whole slice. They’re easier to make than you might think, and the results are always met with oohs and aahs. Get ready to bake up some serious happiness!
Mini Apple Pies
There’s something undeniably charming and utterly delicious about mini apple pies. They’re the perfect portion-sized indulgence, offering all the comforting flavors of a classic apple pie in a cute, manageable package. These little gems are perfect for parties, bake snon-alcoholic ales, or simply when you crave a sweet treat without committing to a full-sized pie. The crisp, flaky crust cradling warm, cinnamon-spiced apples is a symphony of textures and tastes that never fails to bring a smile. Making them from scratch is surprisingly simple, especially with the convenience of refrigerated pie crusts. Let’s get baking!
Ingredients:
Preparing the Apple Filling
The star of any apple pie is, of course, the apples. For these mini pies, I prefer Granny Smith apples. Their tartness provides a wonderful contrast to the sweetness of the sugars and spices, and they hold their shape beautifully during baking, preventing a mushy filling. When chopping the apples, aim for pieces that are about ½ inch in size. This ensures they cook through evenly and are easy to manage within the small pie shells.
In a large bowl, combine the chopped apples with the granulated sugar and light brown sugar. The combination of sugars adds both sweetness and a richer, slightly caramelly depth to the filling. Next, stir in the ground cinnamon and ground nutmeg. These classic baking spices are essential for that quintessential apple pie aroma and flavor. Finally, add the all-purpose flour. This acts as a thickener, helping to bind the juices released from the apples as they cook, creating a luscious filling rather than a watery one. For an extra layer of flavor, drizzle in the vanilla extract and gently toss everything together until the apples are evenly coated.
Assembling the Mini Pies
This is where the fun really begin extracts! We’ll be using standard-sized muffin tins to create our perfectly portioned pies. Begin extract by lightly greasing your muffin tin. This step is crucial to ensure your mini pies don’t stick and release easily once baked. Unroll your refrigerated pie crusts onto a lightly floured surface. You’ll want to cut out circles that are large enough to fit into the muffin tin cups and have a bit of overhang for a decorative edge. A cookie cutter or even a small bowl can be used as a guide. I typically aim for circles about 4-5 inches in diameter.
Gently press each pie crust circle into the cavities of the muffin tin, ensuring it’s snug against the bottom and sides. Don’t worry if the edges are a little uneven; that adds to the rustic charm. Now, carefully spoon the prepared apple filling into each crust-lined muffin cup. Be generous, but don’t overfill, as the apples will soften and reduce slightly in volume as they bake. You want the filling to come up close to the rim of the crust.
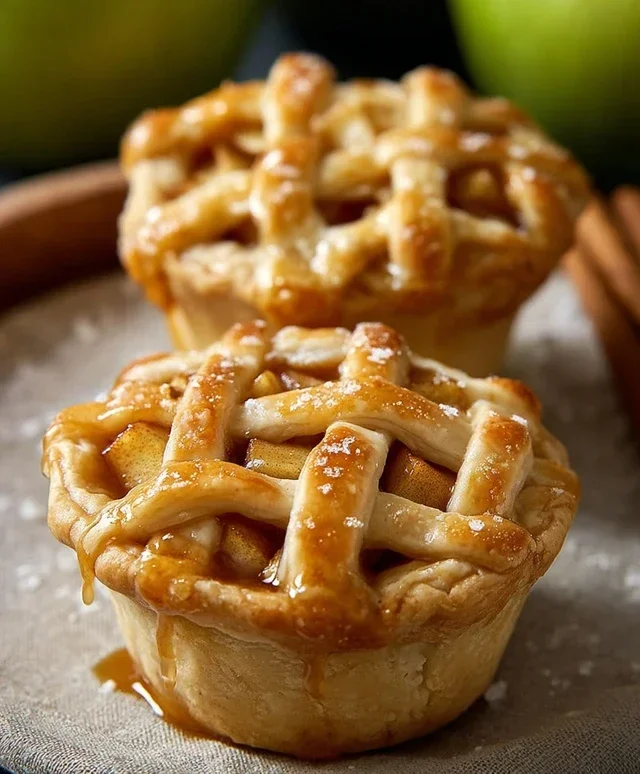
For the tops of our mini pies, you have a couple of options. You can cut out smaller circles of the remaining pie crust to place on top, creating a senon-alcoholic aled pie. Or, for a more rustic look, you can cut thin strips of dough and weave them into a lattice pattern over the filling. Another simple and attractive option is to simply leave them open-faced. If you’re creating senon-alcoholic aled pies or lattice tops, make sure to cut a few small slits in the top crust to allow steam to escape during baking. This prevents the crust from becoming soggy.
Baking the Mini Pies
Before they go into the oven, we want to give our mini pies a beautiful golden finish. In a small bowl, whisk together the egg and the tablespoon of water. This creates an egg wash. Lightly brush this egg wash over the top crusts or edges of the pies. This not only adds a lovely sheen but also helps the sanding sugar (if using) adhere. Sprinkle a little sanding sugar over the tops for a delightful sparkle and a hint of crunch.
Preheat your oven to 400 degrees Fahrenheit (200 degrees Celsius). Place the prepared muffin tin on a baking sheet. This is an important step as it catches any potential drips from the pie filling, keeping your oven clean. Bake the mini apple pies for 20-25 minutes, or until the crust is golden brown and the apple filling is bubbling. You can gently peek under the crust edges to ensure they are nicely browned.
Once baked, carefully remove the muffin tin from the oven. Let the mini pies cool in the muffin tin for about 10-15 minutes. This allows them to firm up slightly, making them easier to remove without falling apart. After this initial cooling period, you can gently loosen the edges with a small offset spatula or a butter knife and carefully lift them out of the muffin tin to cool completely on a wire rack.
Serving and Enjoying
These mini apple pies are best served warm, but they are also delicious at room temperature. They are absolutely delightful on their own, but for an extra special treat, serve them with a scoop of vanilla ice cream, a dollop of whipped cream, or a drizzle of caramel sauce. The combination of warm, spiced apples and cool, creamy toppings is simply heavenly. These mini pies are a wonderful way to enjoy the comforting flavors of fall, no matter the season. They are sure to be a hit with everyone who tries them!
Conclusion:
There you have it! My delightful recipe for mini apple pies. These individual-sized delights are an absolute triumph of flavor and presentation. They’re perfect for satisfying a sweet craving without committing to a whole pie, and their charming appearance makes them a fantastic addition to any gathering, from casual get-togethers to more festive occasions. The balance of sweet, slightly tart apples nestled in a flaky, buttery crust is simply irresistible. I truly encourage you to give this recipe a try; I’m confident you’ll fall in love with these charming mini apple pies just as much as I have!
For serving, I love to enjoy them warm, perhaps with a dollop of fresh whipped cream or a scoop of vanilla bean ice cream. They also make a wonderful breakfast treat or an afternoon pick-me-up. Feel free to get creative with variations! You could add a pinch of nutmeg or cinnamon to the apple filling for an extra layer of spice, or even toss in some chopped cranberries for a festive twist. Consider a crum extractble topping instead of a full crust for a delightful textural contrast. The possibilities are endless, so have fun experimenting and making these mini apple pies your own!
Frequently Asked Questions:
Can I make these mini apple pies ahead of time?
Absolutely! You can assemble the mini apple pies and store them in the refrigerator, covered, for up to 24 hours before baking. For best results, it’s ideal to bake them closer to when you plan to serve them for the freshest crust.
What kind of apples work best for this recipe?
A good mix of sweet and tart apples is key for the best flavor. I often use a combination of Granny Smith (for tartness and firmness) and Honeycrisp or Fuji (for sweetness and a pleasant texture). Avoid apples that become too mushy when cooked.
How should I store leftover mini apple pies?
Once cooled, leftovers can be stored in an airtight container at room temperature for up to two days, or in the refrigerator for up to four days. Reheat them gently in a low oven or toaster oven to revive the crispness of the crust.
Mini Apple Pies
Delightful individual apple pies, perfect for a sweet treat or dessert. Features a flaky crust filled with spiced apple filling.
Ingredients
-
2 refrigerated pie crusts
-
3 cups chopped Granny Smith apples
-
1/4 cup granulated sugar
-
1/4 cup light brown sugar
-
1 teaspoon ground cinnamon
-
1/4 teaspoon ground nutmeg
-
2 tablespoons all-purpose flour
-
1 teaspoon vanilla extract
-
1 egg
-
1 tablespoon water
-
Sanding sugar (optional)
Instructions
-
Step 1
Preheat oven to 375°F (190°C). Lightly grease muffin tins or use mini pie pans. -
Step 2
In a large bowl, combine the chopped apples, granulated sugar, brown sugar, cinnamon, nutmeg, and flour. Toss to coat evenly. -
Step 3
Unroll the pie crusts. Use a round cookie cutter or glass to cut circles that fit the muffin tin cups or mini pie pans. Press the crust circles into the prepared tins. -
Step 4
Spoon the apple filling evenly into each pie crust-lined tin. Add a drop of vanilla extract to each pie before filling. -
Step 5
In a small bowl, whisk together the egg and water to create an egg wash. Brush the edges of the pie crusts with the egg wash. If using, sprinkle sanding sugar over the filling. -
Step 6
Bake for 20-25 minutes, or until the crust is golden brown and the apple filling is bubbly. -
Step 7
Let the mini pies cool in the tins for a few minutes before carefully removing them to a wire rack to cool completely.
Important Information
Nutrition Facts (Per Serving)
It is important to consider this information as approximate and not to use it as definitive health advice.
Allergy Information
Please check ingredients for potential allergens and consult a health professional if in doubt.