Easy No Yeast Pizza Dough – Homemade Pizza
An excellent No Yeast Pizza Dough is your secret weapon for spontaneous pizza nights! Tired of waiting for dough to rise or running out of yeast when that pizza craving strikes? I totally get it! This is the recipe that changed everything for me, and I know you’re going to love it. Forget the fuss and the waiting; we’re talking about crafting delicious, chewy, and perfectly crisp homemade pizza in a fraction of the time. What makes this no yeast pizza dough so special? It’s incredibly forgiving, surprisingly quick to whip up, and results in a crust that’s so satisfying you’ll wonder why you ever bothered with the yeast. Get ready to elevate your weeknight dinners and impress your friends and family with a truly authentic and delightfully easy homemade pizza experience. This is truly an excellent no yeast pizza dough!”
An Excellent No-Yeast Pizza Dough – Quick & Easy Homemade Pizza!
Craving pizza but don’t have the time or inclination to deal with yeast? You’re in luck! This recipe for no-yeast pizza dough is a game-changer. It’s incredibly quick to whip up, requires minimal ingredients you likely already have in your pantry, and produces a wonderfully delicious pizza crust. Forget waiting for dough to rise; we’re talking about fresh, homemade pizza on your table in under an hour. This recipe is perfect for busy weeknights, spontaneous pizza cravings, or when you just want a fuss-free way to enjoy your favorite pizza. The resulting crust is delightfully tender with a slightly crisp edge, providing the perfect base for all your favorite toppings.
Ingredients:
Instructions:
Mixing the Dough:
Let’s get started with making this incredibly simple pizza dough. In a medium-sized mixing bowl, we’re going to combine all of our dry ingredients first. Add the 1 1/3 cups of bread flour (or your all-purpose flour if that’s what you have on hand – it will still work beautifully!). Next, add the 2 teaspoons of baking powder. This is our leavening agent for this no-yeast recipe, so don’t skip it! Follow that with the 3/4 teaspoon of salt, which will add flavor to our crust, and the 3/4 teaspoon of sugar. The sugar not only adds a touch of sweetness but also helps with browning and tenderizing the crust.
Once your dry ingredients are in the bowl, give them a good whisk or stir with a fork. This ensures that the baking powder and salt are evenly distributed throughout the flour. This is a crucial step for achieving a consistent rise and texture in your crust. Now, it’s time to add the wet ingredients. Drizzle in the 2 teaspoons of olive oil. Olive oil will contribute to a tender and slightly chewy crust. Finally, pour in the 1/2 cup of cold tap water. The temperature of the water doesn’t make a huge difference here since we aren’t activating yeast, but cold water is perfectly fine.
Now, using a sturdy spoon or a spatula, start to mix everything together. You’ll notice the mixture will begin extract to come together into a shaggy dough. Keep mixing until most of the flour is incorporated and you have a cohesive ball of dough. It might seem a little sticky at first, and that’s perfectly normal. Don’t be tempted to add too much extra flour at this stage, as it can make the dough tough. The goal is a soft, pliable dough that will be easy to work with.
Kneading and Resting:
Turn the dough out onto a lightly floured surface. You can use a clean countertop or a large cutting board. Sprinkle your surface with a little bit of that extra flour (we’re just using a small amount here, so don’t go overboard). Now, it’s time for a quick knead. You don’t need to knead this dough for a long time like you would with yeast dough. Just a minute or two of gentle kneading is sufficient. Fold the dough over on itself a few times, press down with the heel of your hand, and rotate. This process helps to develop the gluten slightly, which gives the pizza crust structure without making it tough. You’re looking for a smooth, elastic ball of dough that springs back slightly when you poke it.
Once you’ve kneaded the dough for a couple of minutes, form it back into a ball. You can let it rest for about 10-15 minutes. This resting period, while not as critical as with yeast dough, does help to relax the gluten further, making the dough even easier to shape and preventing it from shrinking back too much when you stretch it out. While the dough is resting, you can preheat your oven and prepare your pizza sauce and toppings. Preheat your oven to the highest temperature it can go, typically 450-500°F (230-260°C). A very hot oven is key to a great pizza crust.
Shaping and Topping:
After the brief rest, your dough should be wonderfully easy to handle. If it feels a little sticky, you can lightly flour your hands and the surface again. You can shape the dough in a couple of ways. For a more rustic, freeform pizza, simply press and stretch the dough outwards with your fingertips, working from the center towards the edges. You can also use a rolling pin if you prefer a more uniform thickness. Aim for a circle or an oval shape, about 10-12 inches in diameter. Don’t worry about making it perfectly round – a slightly irregular shape adds to its homemade charm!
If you’re using the optional vegetable oil, now is the time to brush the edges of your pizza crust with it. This will help create a beautifully golden and slightly crispy edge. Be generous but not excessive. Now comes the fun part: adding your favorite pizza sauce and toppings! Spread a thin layer of pizza sauce, leaving a small border for the crust. Then, pile on your cheese and toppings to your heart’s content. Don’t overload the pizza, as too many toppings can make the crust soggy.
Baking the Pizza:
Carefully transfer your assembled pizza to your preheated oven. The best way to do this is to assemble your pizza on a piece of parchment paper and then slide the parchment paper directly onto a hot baking sheet, pizza stone, or pizza steel. If you don’t have parchment paper, you can lightly dust a pizza peel or the back of a baking sheet with cornmeal or flour before placing the dough on it. Bake for 10-15 minutes, or until the crust is golden brown and the cheese is bubbly and melted. Keep an eye on it, as oven temperatures can vary.
Once your pizza is baked to perfection, carefully remove it from the oven. Let it cool for just a minute or two before slicing. This allows the cheese to set slightly and makes it easier to cut. And there you have it – a delicious, quick, and easy homemade pizza made with no yeast! Enjoy your delightful creation!

Conclusion:
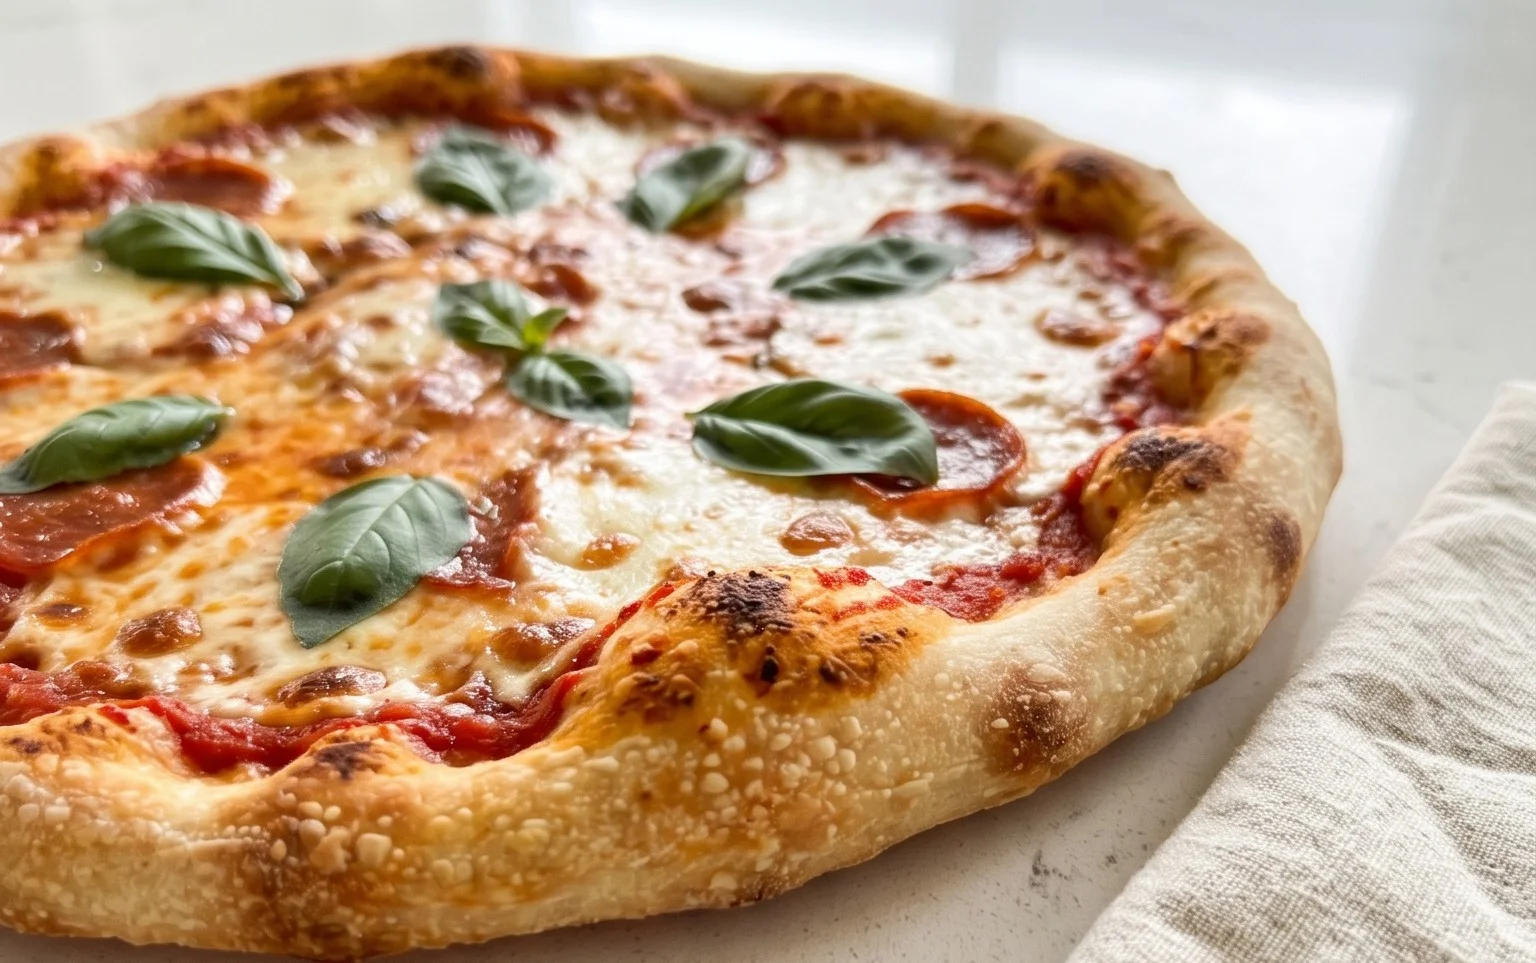
There you have it – the secret to truly excellent no yeast pizza dough! This recipe is a game-changer for anyone craving delicious, homemade pizza without the waiting and fuss of traditional yeast-based doughs. It’s incredibly quick, wonderfully easy, and delivers a satisfyingly chewy yet crispy crust that’s perfect for all your pizza creations. Whether you’re a seasoned home cook or just starting out, you’ll find this recipe approachable and rewarding. We’ve had so much fun experimenting with toppings, from classic Margherita to more adventurous combinations like fig and beef prosciutto. This versatile dough truly is the foundation for your next amazing pizza night. We wholeheartedly encourage you to give this no yeast pizza dough a try – you won’t be disappointed!
Frequently Asked Questions:
What are some great serving suggestions for this no yeast pizza?
This no yeast pizza dough is wonderfully versatile! Serve it hot from the oven with your favorite fresh basil and a drizzle of good olive oil. It pairs beautifully with a crisp green salad for a complete meal. For a fun family activity, set up a “pizza bar” with various sauces, cheeses, and toppings and let everyone build their own personalized pizza. It’s also perfect for impromptu pizza parties or a quick weeknight dinner.
Can I make this dough ahead of time?
Yes! You can prepare the dough and store it in an airtight container in the refrigerator for up to 24 hours. Let it come to room temperature for about 30 minutes before shaping and baking for the best results. This makes it even more convenient for busy days.
What kind of toppings work best with this dough?
Almost any topping will work! For a lighter pizza, try fresh vegetables like bell peppers, onions, mushrooms, and spinach. For something richer, consider beef pepperoni, sausage, or grilled chicken. Don’t forget the cheese – mozzarella is classic, but consider adding some Parmesan or a sprinkle of provolone for extra flavor. The key is not to overload the pizza, which can make the crust soggy.
An Excellent No Yeast Pizza Dough – Quick Easy Homemade Pizza!
A super quick and easy no-yeast pizza dough recipe that’s perfect for a spontaneous pizza night. No waiting for dough to rise!
Ingredients
-
1 1/3 cups bread flour (or plain / all purpose flour)
-
2 tsp baking powder
-
3/4 tsp salt
-
3/4 tsp sugar
-
2 tsp olive oil (or any other oil)
-
1/2 cup water (cold tap water)
-
1 tbsp Extra Flour (, for dusting)
-
2 tsp vegetable oil (optional) (, for brushing crust (or canola or other neutral oil))
Instructions
-
Step 1
In a large bowl, whisk together the flour, baking powder, salt, and sugar. -
Step 2
Add the olive oil and cold water to the dry ingredients. -
Step 3
Mix until a shaggy dough forms. Turn out onto a lightly floured surface and knead for 2-3 minutes until smooth and elastic. -
Step 4
Shape the dough into a ball, cover, and let rest for 10 minutes. This allows the gluten to relax. -
Step 5
Roll or stretch the dough to your desired pizza shape and thickness. -
Step 6
Transfer the dough to a pizza peel or baking sheet. If desired, brush the crust with vegetable oil. -
Step 7
Add your favorite toppings and bake according to your pizza recipe’s instructions.
Important Information
Nutrition Facts (Per Serving)
It is important to consider this information as approximate and not to use it as definitive health advice.
Allergy Information
Please check ingredients for potential allergens and consult a health professional if in doubt.