Keto Glazed Donut Balls – Easy Low-Carb Treat
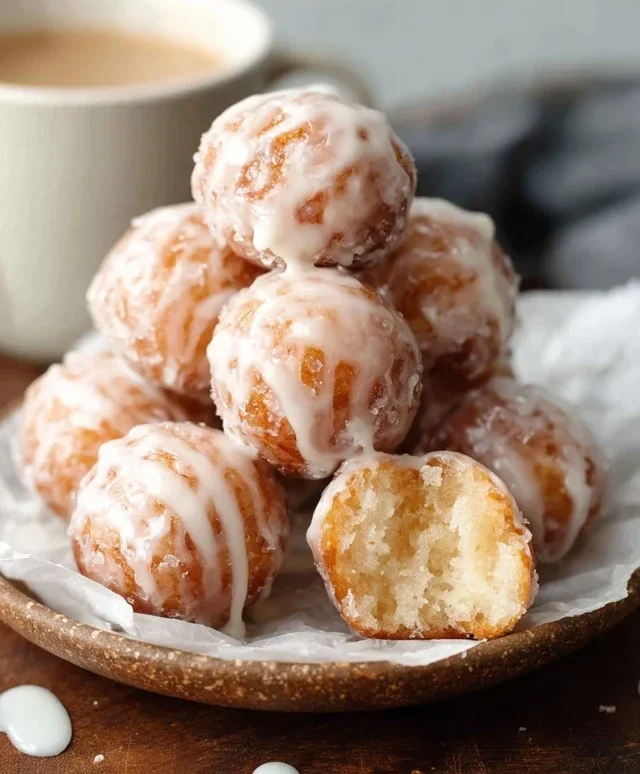
Keto Glazed Donut Balls are about to revolutionize your low-carb mornings and sweet treat cravings. Have you ever found yourself dreaming of that classic donut shop experience, only to be met with the sugary reality that sends your macros into a tailspin? Well, prepare for pure joy because we’ve cracked the code! These delightful Keto Glazed Donut Balls capture all the irresistible flavors and textures of a traditional glazed donut, but without the guilt. Imagin extracte biting into a tender, cakey bite, perfectly glazed to sweet perfection – it’s a dream come true for anyone embracing a ketogenic lifestyle. What makes these so special? They’re incredibly easy to make, incredibly satisfying, and best of all, they’ll make you forget all about those carb-laden alternatives. Get ready to experience donut heaven, the keto way!
Keto Glazed Donut Balls
Craving that sweet, comforting taste of donuts without derailing your keto lifestyle? I’ve got you covered! These Keto Glazed Donut Balls are a game-changer. They’re surprisingly easy to make, wonderfully satisfying, and taste just like the real deal, minus the carbs and sugar. Forget those chalky, unsatisfying keto baked goods – these are light, airy, and coated in a luscious glaze that will have you coming back for more. They’re perfect for a weekend treat, a special breakfast, or even a guilt-free dessert. Get ready to impress yourself and anyone lucky enough to share them with you!
Ingredients:
For the Glaze:
Instructions:
Phase 1: Preparing the Donut Ball Dough
1. In a large mixing bowl, begin extract by creaming together the softened cream cheese and softened butter. I like to use an electric mixer for this, as it ensures a smooth and lump-free base. Beat them together until they are light and fluffy, incorporating plenty of air. This step is crucial for achieving a tender texture in your donut balls. Make sure both the cream cheese and butter are truly at room temperature; cold ingredients will result in a lumpy batter. Don’t rush this part – aim for a good 2-3 minutes of beating.
2. Next, gradually add the powdered erythritol to the creamed mixture, continuing to beat until well combined. Powdered sweetener is key here, as granulated sweeteners can leave a slightly gritty texture. If your erythritol isn’t powdered, you can easily do so by pulsing it in a clean coffee grinder or food processor until it reaches a fine consistency. Then, beat in the two large eggs, one at a time, ensuring each is fully incorporated before adding the next. Follow this with the vanilla extract, giving it a final mix to distribute the flavor evenly throughout the batter. The batter will look quite rich and smooth at this stage.
3. In a separate, smaller bowl, whisk together the finely ground almond flour, baking powder, and salt. It’s important to sift these dry ingredients or whisk them thoroughly to break up any clumps and ensure even distribution. The baking powder is what will give our donut balls their lift, making them light and airy rather than dense. Add this dry mixture to the wet ingredients in your large mixing bowl. Gently mix everything together until just combined. Be careful not to overmix the batter at this stage, as overmixing can develop the gluten in the almond flour and lead to tougher donut balls. You want a soft, cohesive dough.
Phase 2: Shaping and Baking
4. Preheat your oven to 350°F (175°C). Line a baking sheet with parchment paper to prevent sticking. Now, it’s time to form our donut balls. Using a tablespoon or a small cookie scoop, portion out the dough. Roll each portion gently between your palms to form smooth, round balls. The dough will be a little sticky, so you can lightly dampen your hands with water or a bit of almond flour if needed, but try not to add too much extra, as it can alter the texture. Place the formed balls onto the prepared baking sheet, leaving a little space between each one as they will puff up slightly during baking.
5. Bake the donut balls for 12-15 minutes, or until they are lightly golden brown around the edges and a toothpick inserted into the center comes out clean. Keep a close eye on them as oven times can vary. Overbaking will result in dry donut balls, so aim for that perfect tender interior. Once baked, carefully remove the baking sheet from the oven and let the donut balls cool on the sheet for about 5 minutes before transferring them to a wire rack to cool completely. This cooling period is essential before glazing, as a hot donut ball will melt the glaze into a messy puddle.
Phase 3: Glazing the Donut Balls
6. While the donut balls are cooling, prepare the glaze. In a medium bowl, combine the powdered erythritol, melted butter, and vanilla extract. Whisk them together until smooth. The consistency should be thick but pourable. If it’s too thick, add the unsweetened almond milk (or heavy cream) one tablespoon at a time, whisking until you reach your desired consistency. For a richer glaze, use heavy cream instead of almond milk. Once the donut balls have cooled completely on the wire rack, it’s time to glaze them. You can either dip each donut ball into the glaze or use a spoon to drizzle the glaze over the tops. Let the glaze set completely before serving. This can take anywhere from 15-30 minutes. You can speed this up by placing the glazed donut balls in the refrigerator for about 10-15 minutes.
Enjoy these delightful Keto Glazed Donut Balls! They’re a fantastic way to satisfy your sweet cravings without the sugar rush and carb crash. They store well in an airtight container in the refrigerator for up to 3 days, though I doubt they’ll last that long!
Conclusion:
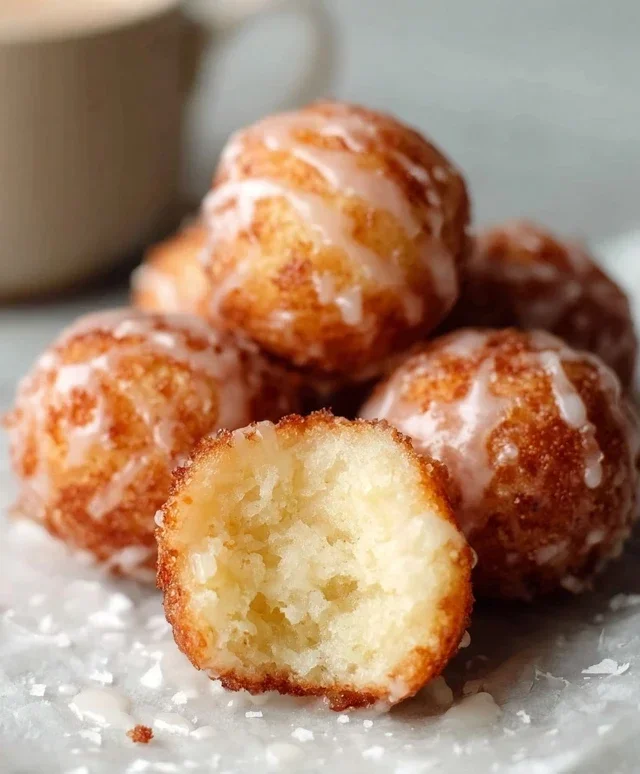
You’ve now got the knowledge to whip up a batch of delicious Keto Glazed Donut Balls that are incredibly satisfying and perfectly align with a low-carb lifestyle. What makes this recipe truly special is its ability to deliver that classic donut experience – a tender, cakey interior with a sweet, glossy glaze – without the sugar and carb overload. They’re surprisingly simple to make, making them an ideal treat for both begin extractner bakers and seasoned keto enthusiasts looking for a quick indulgence.
These Keto Glazed Donut Balls are fantastic on their own, of course, but they also shine when paired with your morning coffee or tea, or as a delightful dessert after a keto-friendly meal. For variations, consider adding a pinch of cinnamon to the dough for a spiced kick, or swirling in some sugar-free chocolate chips. You could also experiment with different extracts in the glaze, like a hint of almond or lemon, to create unique flavor profiles. I really encourage you to give these a try; you won’t believe how easy it is to enjoy such a decadent treat while staying true to your keto goals.
Frequently Asked Questions:
Q1: Can I make these Keto Glazed Donut Balls ahead of time?
Absolutely! The donut balls themselves can be baked and stored in an airtight container at room temperature for up to 2-3 days. It’s best to glaze them just before serving for the freshest, glossiest finish, but they can also be glazed ahead and stored, although the glaze might become a little less shiny over time.
Q2: What’s the best way to store leftover glaze?
If you have any leftover glaze, you can store it in an airtight container in the refrigerator. It might thicken up considerably once chilled. To use it again, simply warm it gently on the stovetop over low heat or in the microwave in short bursts, stirring frequently until it reaches a drizzling consistency again.
Keto Glazed Donut Balls
Deliciously soft and sweet keto donut balls, coated in a simple sugar-free glaze. Perfect for a low-carb treat.
Ingredients
-
1 ½ cups almond flour
-
¼ cup erythritol
-
2 tablespoons melted butter
-
1 large egg
-
1 teaspoon baking powder
-
½ teaspoon vanilla extract
-
½ cup powdered erythritol
-
2 tablespoons unsweetened almond milk
Instructions
-
Step 1
Preheat oven to 350°F (175°C). Grease a mini muffin tin or line with parchment liners. -
Step 2
In a medium bowl, combine almond flour, ¼ cup erythritol, and baking powder. Whisk to combine. -
Step 3
In a separate small bowl, whisk together the melted butter, egg, and vanilla extract. -
Step 4
Pour the wet ingredients into the dry ingredients and mix until just combined. The dough will be thick. -
Step 5
Roll the dough into small balls (about 1 inch in diameter) and place them in the prepared mini muffin tin. -
Step 6
Bake for 10-12 minutes, or until lightly golden brown and cooked through. -
Step 7
While the donut balls are baking, prepare the glaze. In a small bowl, whisk together powdered erythritol and almond milk until smooth and pourable. Add more almond milk a teaspoon at a time if needed to reach desired consistency. -
Step 8
Once baked, let the donut balls cool for a few minutes in the tin, then transfer to a wire rack to cool completely. -
Step 9
Dip each cooled donut ball into the glaze, letting any excess drip off. Place back on the wire rack to set.
Important Information
Nutrition Facts (Per Serving)
It is important to consider this information as approximate and not to use it as definitive health advice.
Allergy Information
Please check ingredients for potential allergens and consult a health professional if in doubt.