Nut-Free Pesto Recipe Delicious & Easy
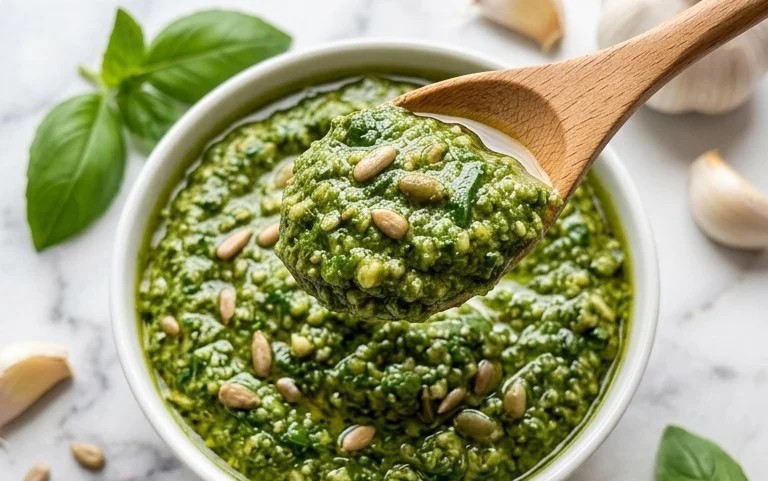
Nut free pesto is a game-changer for anyone with allergies or simply looking for a delicious and versatile sauce that everyone can enjoy. For years, I’ve loved the vibrant flavor of traditional pesto, but the constant worry about nuts made it a dish I often had to skip or painstakingly modify. That’s why I set out to create a truly exceptional nut free pesto, one that delivers all the bright, herbaceous goodness without any of the allergens. This isn’t just a substitute; it’s a star in its own right. It’s perfect for drizzling over pasta, spreading on sandwiches, tossing with roasted vegetables, or even as a dip. The secret lies in a thoughtful blend of ingredients that creates a rich texture and a complex flavor profile that rivals its nut-filled counterpart. Get ready to fall in love with this incredible nut free pesto!
Nut-Free Pesto: A Creamy, Dreamy Delight for Everyone
Pesto is a staple in my kitchen. Its vibrant green hue and robust flavor instantly elevate pasta dishes, sandwiches, and even grilled vegetables. However, for many, the traditional pine nut-based pesto is off-limits due to allergies. That’s where this delicious nut-free version comes in! We’re going to create a pesto that’s just as satisfying, bursting with fresh basil and savory Parmesan, and completely safe for those with nut allergies. This recipe is incredibly straightforward and results in a wonderfully versatile sauce that you’ll find yourself reaching for again and again. Forget the worry; embrace the flavor!
Ingredients:
Crafting Your Nut-Free Pesto
Making this pesto is a joy because it’s so quick and easy. You can achieve fantastic results using a food processor or a blender. The key is to get a beautiful, emulsified sauce that coats your ingredients perfectly. Let’s get started!
Step 1: Prepare Your Basil
Begin extract by ensuring your basil leaves are fresh and vibrant. Gently wash and thoroughly dry them. Excess water can make your pesto watery, so I like to give them a good shake and then pat them dry with a clean kitchen towel or use a salad spinner. Remove any tough stems, as these can impart a slightly bitter flavor. You want to focus on those tender, fragrant leaves for the best pesto. Packing them into the measuring cup helps ensure you have the right amount of basil for a potent flavor.
Step 2: Introduce the Aromatics and Cheese
In the bowl of your food processor (or the jar of your blender), add the peeled garlic cloves. Give them a quick pulse to roughly chop them. Then, add the packed fresh basil leaves. You might need to add the basil in batches if your food processor is on the smaller side. Pulse again until the basil is finely chopped. Now, add the freshly grated Parmesan cheese. Using freshly grated cheese makes a noticeable difference in texture and flavor compared to pre-shredded options, which often contain anti-caking agents.
Step 3: Emulsify with Olive Oil
With the food processor running on a low speed, slowly drizzle in the olive oil. This is where the magic happens – the oil emulsifies with the basil and cheese to create that signature creamy pesto texture. Continue to process until the mixture is smooth and well combined. You’re looking for a vibrant green paste that’s not too thick or too thin. If it seems a bit too thick for your liking, you can add another tablespoon of olive oil at this stage and process again until you reach your desired consistency. This slow addition of oil is crucial for achieving a smooth, spreadable pesto.
Step 4: Season to Perfection
Once the pesto has reached a lovely consistency, it’s time to season. Add the salt and pepper to the food processor. Pulse a few more times to incorporate the seasonings evenly. Taste the pesto at this point. Everyone’s palate is different, so don’t be afraid to adjust the salt and pepper to your preference. You might find you want a touch more salt to really bring out the flavors, or a little extra pepper for a subtle kick. This is your pesto, so make it yours!
Step 5: Storing and Enjoying Your Nut-Free Creation
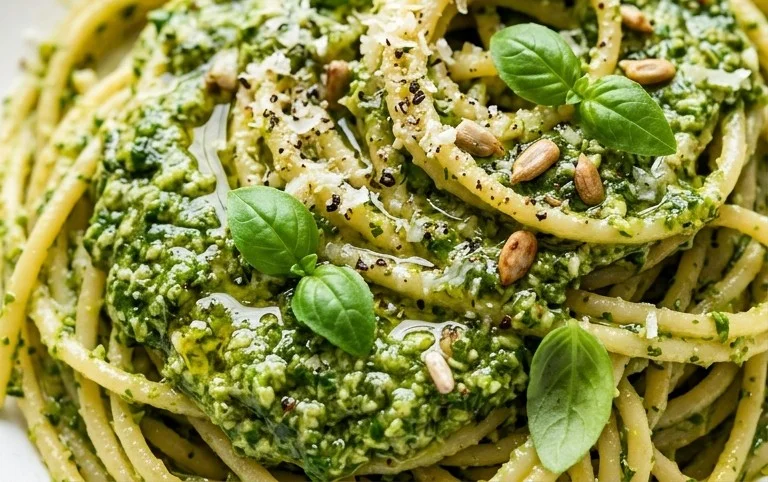
Your delicious nut-free pesto is now ready to be enjoyed! Transfer it to an airtight container. To prevent browning, especially if you’re not using it immediately, you can pour a thin layer of olive oil over the surface of the pesto before sealing the container. This creates a barrier against air exposure. Store it in the refrigerator for up to 5-7 days. For longer storage, you can freeze the pesto in an ice cube tray. Once frozen, transfer the cubes to a freezer bag for convenient portions. Thaw by letting it sit at room temperature for a bit or gently warming it. This nut-free pesto is incredibly versatile. Toss it with your favorite pasta, spread it on sandwiches or crostini, dollop it onto grilled chicken or fish, or stir it into dips and sauces. The possibilities are truly endless! Enjoy the vibrant taste of homemade pesto without the worry.
Conclusion:
I hope you’re as excited as I am about this fantastic nut-free pesto! It’s a game-changer for anyone with nut allergies or simply looking for a delicious alternative to traditional pesto. What makes this recipe so great is its incredible versatility and vibrant flavor, all achieved without a single nut. It’s incredibly easy to whip up, making it perfect for a quick weeknight meal or a special occasion. The creamy texture and fresh, herby taste are sure to impress. I really encourage you to give this nut-free pesto a try – you won’t be disappointed!
Serving this nut-free pesto is a joy because it pairs beautifully with so many dishes. Toss it with your favorite pasta for a classic, satisfying meal. It’s also wonderful spread on sandwiches, drizzled over grilled chicken or fish, or used as a dip for fresh vegetables. For variations, don’t be afraid to experiment! You can swap out some of the basil for spinach or knon-alcoholic ale for a different color and nutrient boost. Adding a pinch of red pepper flakes can introduce a gentle warmth.
Frequently Asked Questions:
Can I freeze this nut-free pesto?
Absolutely! This nut-free pesto freezes wonderfully. Portion it into ice cube trays for single servings, or store larger amounts in airtight containers or freezer bags. It should keep its delicious flavor for up to 3-4 months. Just thaw it in the refrigerator before use.
What can I use instead of pine nuts if I have a seed allergy?
If you need to avoid seeds as well as nuts, you can achieve a lovely texture and richness by using toasted sunflower seeds or pumpkin seeds as a direct substitute for the pine nuts. Make sure they are toasted to bring out their best flavor before blending them into the pesto.
How long will this pesto last in the refrigerator?
Stored properly in an airtight container, typically with a thin layer of olive oil on top to prevent oxidation, this nut-free pesto will stay fresh in the refrigerator for about 5-7 days. Always check for any signs of spoilage before consuming.
Nut Free Pesto
A delicious and nut-free pesto made with fresh basil, garlic, and Parmesan cheese.
Ingredients
-
2 cups fresh basil
-
2 garlic cloves
-
1/2 cup freshly grated Parmesan cheese
-
1/4 cup olive oil
-
1/4 teaspoon salt
-
1/8 teaspoon pepper
Instructions
-
Step 1
Wash and dry the fresh basil leaves. -
Step 2
Peel and mince the garlic cloves. -
Step 3
In a food processor, combine the basil, garlic, Parmesan cheese, salt, and pepper. -
Step 4
Pulse until the ingredients are finely chopped. -
Step 5
With the food processor running, slowly drizzle in the olive oil until the pesto is smooth and well combined. -
Step 6
Taste and adjust seasoning if necessary.
Important Information
Nutrition Facts (Per Serving)
It is important to consider this information as approximate and not to use it as definitive health advice.
Allergy Information
Please check ingredients for potential allergens and consult a health professional if in doubt.