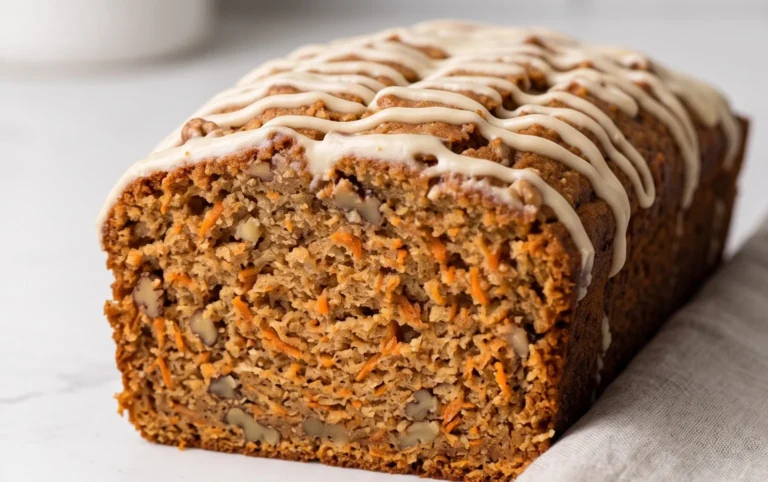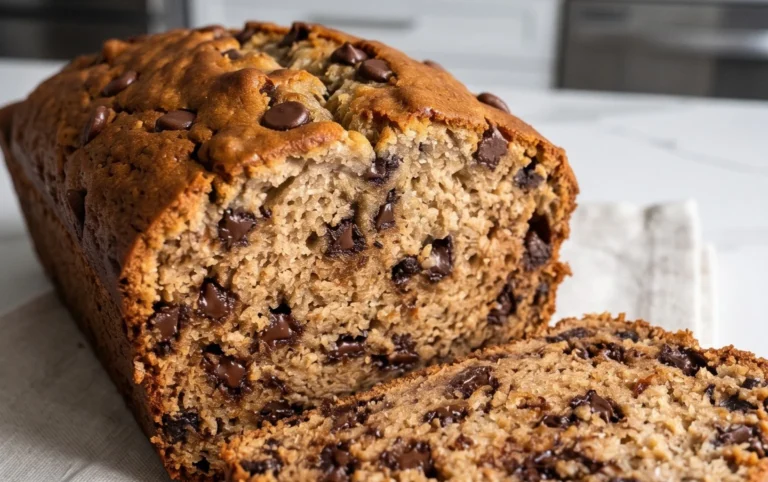
Old Fashioned Banana Bread- The Best Recipe
Old Fashioned Banana Bread is more than just a baked good; it’s a comforting hug in loaf form, a taste of nostalgia that instantly transports us back to simpler times. There’s a reason why this classic recipe has endured for generations. It’s incredibly forgiving, a wonderful way to use up those overripe bananas that are just beggin extractg for a purpose, and the result is consistently moist, fragrant, and utterly delicious. What truly sets this Old Fashioned Banana Bread apart is its beautiful simplicity. No fancy ingredients or complicated techniques are needed here. It’s about the pure, unadulterated goodness of sweet bananas, warm spices, and a touch of buttery richness. Every slice evokes a sense of home, a perfect companion to a morning cup of coffee or an afternoon treat. Get ready to bake up a batch that will have everyone asking for seconds!
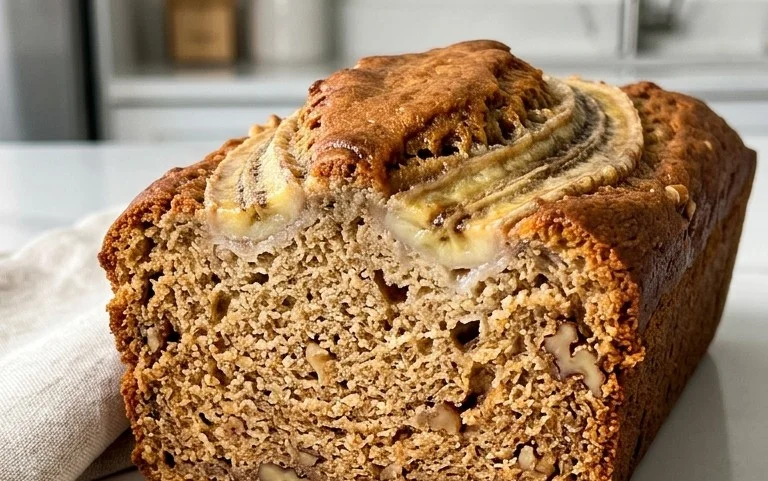
Old Fashioned Banana Bread
There’s something incredibly comforting about a slice of warm, homemade banana bread. It’s a classic for a reason – simple, delicious, and a fantastic way to use up those overripe bananas that are just beggin extractg for a second life. This recipe is my go-to, a true old-fashioned rendition that’s moist, flavorful, and always a crowd-pleaser. Forget those dry, crum extractbly versions; this one is wonderfully tender and packed with banana goodness.
The secret to truly spectacular banana bread lies in the ripeness of your bananas. The spottier and browner, the better! They’ll lend a natural sweetness and an intense banana flavor that’s irreplaceable. Don’t be shy about using those bananas that might look past their prime for eating plain – they are exactly what we’re looking for here. This recipe is surprisingly forgiving, making it perfect for bakers of all levels.
Let’s gather our ingredients and get started on this delightful baking adventure.
Ingredients:
Getting Started: Prepping the Loaf
Before we dive into mixing, let’s get our baking environment ready. Preheat your oven to 350 degrees Fahrenheit (175 degrees Celsius). This is a moderate temperature that allows the banana bread to bake evenly without burning the outside before the inside is cooked through. Next, prepare your loaf pan. A standard 9×5 inch loaf pan is ideal. Grease it thoroughly with butter or cooking spray, and then lightly dust it with flour. This “flourishing” step ensures that your beautiful banana bread will slide right out of the pan once it’s baked. Alternatively, you can line your loaf pan with parchment paper, leaving some overhang on the sides to act as handles for easy lifting.
Step-by-Step Baking Instructions
1. Creaming the Butter and Sugar: In a large mixing bowl, begin extract by creaming together the softened unsalted butter and granulated sugar. You want to beat these together until the mixture is light, fluffy, and pnon-alcoholic ale yellow. This process, known as creaming, incorporates air into the batter, which contributes to the tender texture of the finished bread. I like to use an electric mixer for this, but a sturdy whisk and a bit of elbow grease will also do the trick. Make sure your butter is truly at room temperature – not melted, but soft enough to be easily indented with your finger. This will ensure a smooth, homogenous mixture.
2. Adding the Wet Ingredients: Once the butter and sugar are beautifully combined, it’s time to add the eggs. Beat in the two large eggs, one at a time, ensuring each is fully incorporated before adding the next. After the eggs, stir in the vanilla extract. Vanilla is a wonderful flavor enhancer that complements the sweetness of the bananas and the richness of the butter. Finally, fold in the mashed overripe bananas. The goal here is to gently combine everything. Overmixing at this stage can lead to a tougher bread, so just ensure everything is just incorporated. The mashed bananas will give the batter a lovely thick, slightly lumpy consistency, which is exactly what we want.
3. Combining the Dry Ingredients: In a separate medium bowl, whisk together the flour, baking soda, baking powder, and fine sea salt. Whisking these dry ingredients together helps to evenly distribute the leavening agents (baking soda and baking powder) and the salt throughout the flour. This ensures that your banana bread will rise evenly and have a balanced flavor. Baking soda is activated by the acidity in the bananas, while baking powder provides an extra lift, ensuring a light and airy crum extractb.
4. Bringin extractg It All Together: Now, it’s time to combine the wet and dry ingredients. Gradually add the dry ingredient mixture to the wet ingredient mixture, stirring until just combined. Again, resist the urge to overmix. A few streaks of flour remaining are perfectly fine; they will disappear as the bread bakes. Overmixing at this stage develops the gluten in the flour too much, which can result in a tough, rubbery loaf. We’re aiming for a tender, moist crum extractb, so gentle mixing is key.
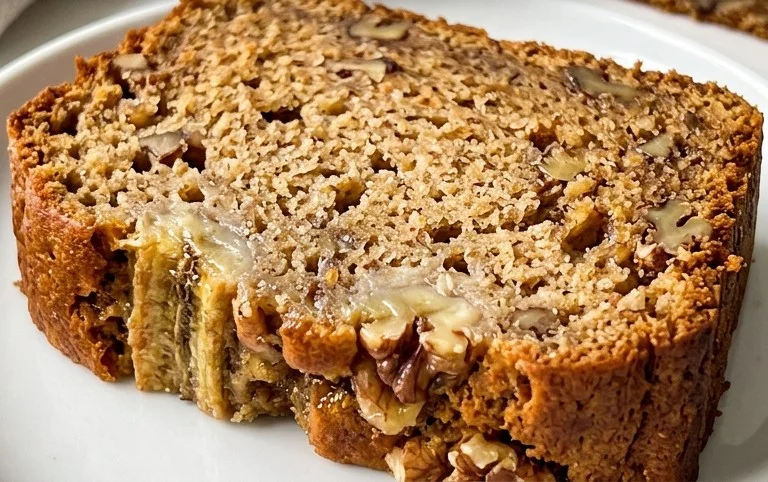
5. Folding in the Walnuts and Baking: This is where we add that delightful crunch! Gently fold in the chopped walnuts. If you’re not a fan of walnuts, feel free to omit them or substitute them with pecans or chocolate chips for a different flavor profile. Once the walnuts are evenly distributed, pour the batter into your prepared loaf pan. Smooth the top with a spatula.
Place the loaf pan in the preheated oven. Bake for 55-70 minutes, or until a wooden skewer or toothpick inserted into the center of the loaf comes out clean. The baking time can vary depending on your oven, so it’s important to start checking for doneness around the 55-minute mark. If the top of the bread is browning too quickly before the center is cooked, you can loosely tent the loaf pan with aluminum foil.
Cooling and Enjoying
Once your banana bread is baked to perfection, carefully remove it from the oven. Let it cool in the loaf pan for about 10-15 minutes before attempting to remove it. This initial cooling period allows the bread to set up properly, making it less likely to break when you take it out of the pan. After this initial cooling, invert the loaf onto a wire rack to cool completely. Patience is key here! While it’s incredibly tempting to slice into it immediately, allowing it to cool completely ensures that the flavors meld and the texture is at its best. Once cooled, slice, serve, and savor the simple, timeless deliciousness of your old-fashioned banana bread. It’s fantastic on its own, or with a smear of butter. Enjoy every bite!
Conclusion:
There you have it – a foolproof guide to crafting the most delightful old fashioned banana bread. This recipe isn’t just about baking; it’s about creating a warm, comforting aroma that fills your home and a treat that brings smiles to faces. The beauty of this banana bread lies in its simplicity and its ability to transform ripe bananas into something truly special. It’s incredibly forgiving, making it perfect for bakers of all levels, and the result is a moist, tender loaf with that classic, irresistible banana flavor.
Serve slices warm, perhaps with a dollop of butter or a drizzle of honey. It’s also fantastic toasted and topped with cream cheese or peanut butter for a delightful breakfast or snack. Feel free to get creative with variations! Consider adding a handful of chocolate chips, chopped walnuts or pecans, or a sprinkle of cinnamon and nutmeg to the batter for an extra layer of flavor. Don’t be afraid to experiment! I truly encourage you to give this wonderful old fashioned banana bread a try; I’m confident you’ll love the delicious results.
Frequently Asked Questions:
What makes this banana bread “old fashioned”?
The “old fashioned” designation typically refers to a classic, straightforward recipe that relies on simple ingredients and techniques. It emphasizes achieving that traditional, home-baked flavor and texture without overly complicated additions or modern shortcuts. This recipe focuses on the pure essence of banana flavor developed through ripe fruit and a balanced batter.
Can I freeze my banana bread?
Absolutely! Once completely cooled, wrap the banana bread tightly in plastic wrap, followed by a layer of aluminum foil or place it in an airtight freezer bag. It can be frozen for up to 3 months. Thaw at room temperature before enjoying. It’s a great way to have this delicious treat on hand whenever a craving strikes!
My bananas aren’t very ripe, can I still make this recipe?
While very ripe bananas are ideal for the sweetest and most intense banana flavor, you can still use slightly less ripe ones. The bread might not be quite as moist or sweet, but it will still be delicious. For a flavor boost, you can mash your less ripe bananas and let them sit with the sugar for about 15-20 minutes before proceeding with the recipe. This helps to break down the starches and enhance their sweetness.
Old Fashioned Banana Bread
A classic and moist banana bread recipe made with simple ingredients.
Ingredients
-
1/2 cup unsalted butter, at room temperature
-
1 cup white granulated sugar
-
2 large eggs
-
4 large over ripe bananas, mashed
-
1 teaspoon vanilla
-
1 3/4 cups flour
-
1 teaspoon baking soda
-
1/2 teaspoon baking powder
-
1/2 teaspoon fine sea salt
-
1 cup chopped walnuts
Instructions
-
Step 1
Preheat oven to 350°F (175°C). Grease and flour a 9×5 inch loaf pan. -
Step 2
In a large bowl, cream together the softened butter and sugar until light and fluffy. -
Step 3
Beat in the eggs one at a time, then stir in the mashed bananas and vanilla. -
Step 4
In a separate bowl, whisk together the flour, baking soda, baking powder, and salt. -
Step 5
Gradually add the dry ingredients to the wet ingredients, mixing until just combined. Do not overmix. -
Step 6
Fold in the chopped walnuts. -
Step 7
Pour batter into the prepared loaf pan and bake for 55-65 minutes, or until a wooden skewer inserted into the center comes out clean. -
Step 8
Let cool in the pan for 10 minutes before inverting onto a wire rack to cool completely.
Important Information
Nutrition Facts (Per Serving)
It is important to consider this information as approximate and not to use it as definitive health advice.
Allergy Information
Please check ingredients for potential allergens and consult a health professional if in doubt.