Peppermint Mocha Cookies-Festive Coffee Treat
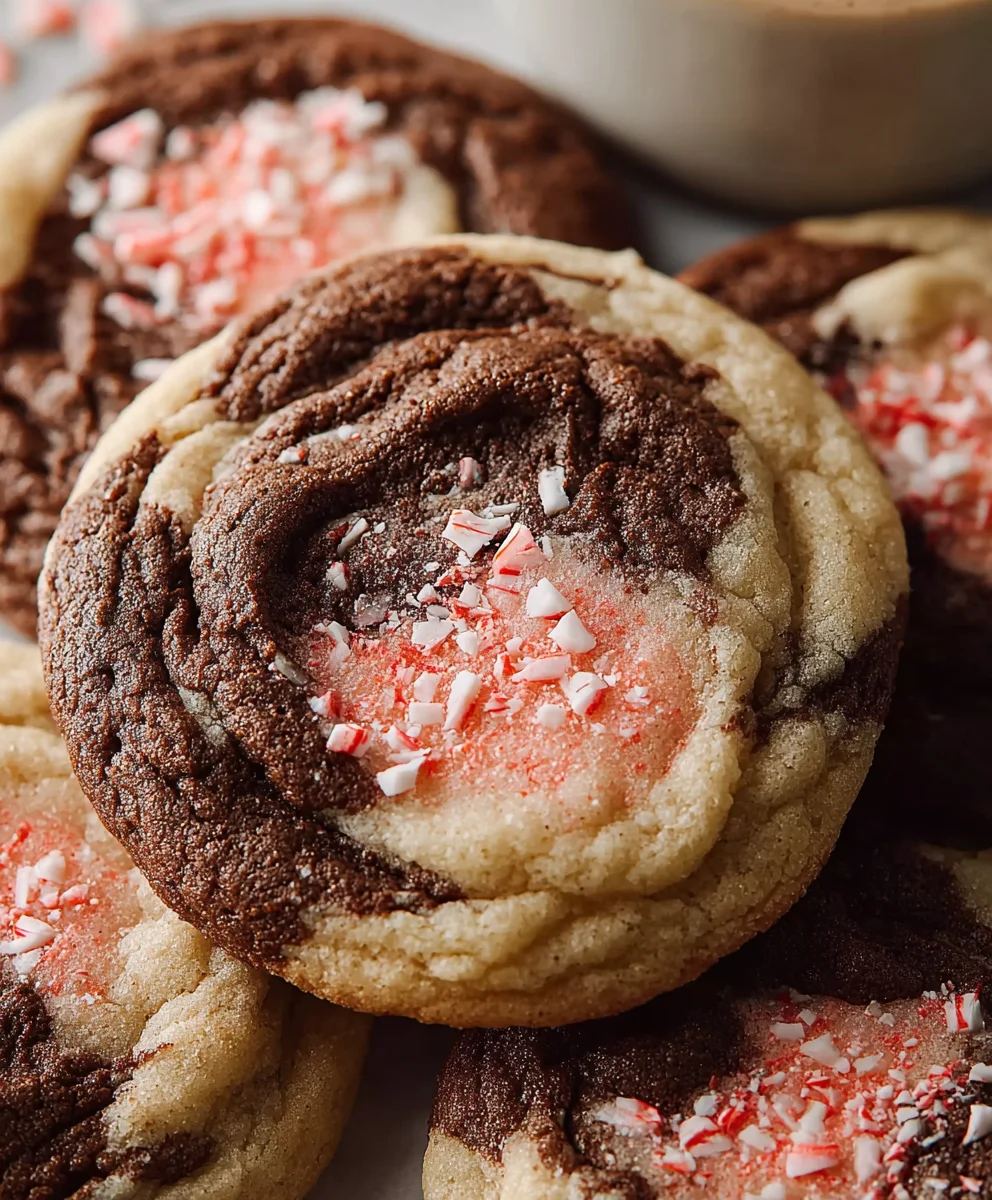
Peppermint Mocha Cookies are the ultimate treat to capture the cozy, festive spirit of the holiday season! There’s something undeniably magical about the fusion of rich, dark chocolate with the invigorating, cool kiss of peppermint, all wrapped up in a delightful cookie. It’s a flavor combination that instantly transports us to crackling fireplaces, twinkling lights, and the joy of sharing sweet moments. People adore these cookies not just for their irresistible taste but also for their charming aesthetic; that signature swirl of peppermint and deep cocoa brown just screams celebration. What truly makes our Peppermint Mocha Cookies special is the perfect balance we strike – they’re intensely chocolatey without being overpowering, and the peppermint provides a refreshing counterpoint that leaves you wanting another bite. They’re surprisingly easy to make, yet they deliver a sophisticated flavor profile that will impress everyone, from the most discerning cookie connoisseur to the little ones excited for a festive indulgence. Get ready to experience pure bliss with every bite!
Ingredients:
- 1 cup (227g) unsalted butter, softened to room temperature
- 1¼ cup (250g) granulated sugar, plus extra for rolling the cookies
- 1 large egg, at room temperature
- 1 teaspoon pure vanilla extract
- ½ teaspoon pure peppermint extract
- ½ teaspoon baking powder
- ½ teaspoon fine sea salt
- ¼ teaspoon baking soda
- 2¼ cups (280g) all-purpose flour
- ½ teaspoon instant coffee granules (espresso powder can also be used)
- 2 tablespoons unsweetened cocoa powder
- Pink food gel (for coloring the peppermint swirls)
Preparing the Peppermint Mocha Dough
Creaming the Butter and Sugar
Begin extract by ensuring your unsalted butter is truly softened, not melted. This means it should yield to gentle pressure from your finger. In a large mixing bowl, cream together the softened butter and the granulated sugar until the mixture is light and fluffy. This process, often called creaming, incorporates air into the dough, which will contribute to a tender cookie texture. I like to use an electric mixer on medium speed for about 3-5 minutes, scraping down the sides of the bowl occasionally to ensure everything is evenly combined.
Adding Wet Ingredients and Flavorings
Next, add the room temperature large egg and the vanilla extract to the creamed butter and sugar mixture. Beat until well combined and smooth. Now comes the fun part for the peppermint mocha flavor! Stir in the potent peppermint extract and the instant coffee granules. The coffee granules will dissolve into the wet ingredients, lending a subtle depth of flavor that beautifully complements the chocolate and peppermint. Don’t worry if the mixture looks a little flecked from the coffee; it will all blend in.
Incorporating Dry Ingredients for the Chocolate Base
In a separate medium bowl, whisk together the all-purpose flour, unsweetened cocoa powder, baking powder, baking soda, and salt. Whisking the dry ingredients ensures that the leavening agents (baking powder and baking soda) and salt are evenly distributed throughout the flour, preventing pockets of saltiness or uneven rising in your cookies. Gradually add this dry mixture to the wet ingredients in the large mixing bowl. Mix on low speed, or by hand with a sturdy spatula, just until the flour is incorporated and no dry streaks remain. Be careful not to overmix the dough at this stage, as overmixing can develop the gluten in the flour, leading to tough cookies.
Creating the Peppermint Swirls and Shaping the Cookies
Dividing and Tinting the Dough
Once the chocolate dough is formed, it’s time to create the festive peppermint swirls. Divide the dough roughly in half. To one half of the dough, add a few drops of pink food gel. Start with a small amount and add more gradually until you achieve your desired shade of pink. Knead the food gel into this portion of the dough until the color is uniform and vibrant. The pink food gel is key to creating that beautiful marbled effect that makes these Peppermint Mocha Cookies so appealing. Make sure to wear gloves if you’re concerned about staining your hands.
Marbling and Chilling the Dough
Now, gently combine the plain chocolate dough and the pink peppermint dough. You don’t want to fully mix them together; instead, you’re aiming for streaks and swirls. Tear off pieces of each dough and press them together, then gently fold and twist them a few times. Think of it like making marbled cake batter. The more you swirl, the more blended the colors will become, so stop when you are happy with the marbled appearance. Wrap both portions of dough (or the swirled dough) tightly in plastic wrap and refrigerate for at least 1 hour. Chilling the dough is crucial. It firms up the butter, making the dough easier to handle, prevents the cookies from spreading too much during baking, and allows the flavors to meld and deepen.
Shaping and Rolling the Cookies
Preheat your oven to 350°F (175°C) and line baking sheets with parchment paper. Remove the chilled dough from the refrigerator. On a lightly floured surface, gently roll out the marbled dough to about ¼-inch thickness. For the prettiest cookies, you want distinct swirls, so avoid overworking the dough at this stage. Use cookie cutters to cut out your desired shapes. You can use any festive shapes you like, such as stars, snowflakes, or simple rounds. Gather the scraps, gently re-roll (don’t overwork), and cut out more cookies until all the dough is used. For an extra touch of sweetness and sparkle, I like to lightly press the tops of the cut cookies into a shallow dish of granulated sugar before placing them on the prepared baking sheets. This adds a lovely crunch and visual appeal.
Baking and Cooling for Perfect Peppermint Mocha Cookies
Baking the Cookies to Perfection
Arrange the shaped cookies on the prepared baking sheets, leaving about 2 inches of space between them to allow for slight spreading. Bake for 9-12 minutes, or until the edges of the cookies are set and lightly golden. The center of the cookies should still look slightly soft. Overbaking will result in dry, hard cookies, so keep a close eye on them, especially during the last few minutes of baking. The baking time can vary depending on the size and thickness of your cookies and your oven.
Cooling and Setting the Flavors
Once baked, carefully remove the baking sheets from the oven. Let the cookies cool on the baking sheets for 5 minutes. This allows them to firm up slightly before you attempt to move them. After 5 minutes, transfer the cookies to a wire rack to cool completely. This step is essential for the cookies to fully set and for the flavors to develop. As they cool, the peppermint and chocolate notes will become even more pronounced. You can enjoy them once they are completely cool, or even better, let them sit for a few hours at room temperature to allow the flavors to meld further.

Conclusion:
And there you have it! Your very own batch of delicious Peppermint Mocha Cookies. These cookies are a perfect blend of rich chocolate, invigorating peppermint, and a hint of coffee, making them an ideal treat for any occasion, especially during the holidays. I hope you enjoyed making them as much as I do! The aroma alone is enough to bring a smile to your face.
These Peppermint Mocha Cookies are wonderfully versatile. Serve them warm with a glass of cold milk, or let them cool completely and enjoy them with a hot cup of coffee or tea. They also make fantastic homemade gifts! Consider gifting them in a decorative tin or cellophane bag tied with a festive ribbon. For variations, feel free to add a sprinkle of crushed candy canes on top before baking for an extra crunch and peppermint kick. You could also try incorporating a touch of espresso powder directly into the dough for an even more intense coffee flavor. Don’t be afraid to experiment and make them your own!
I encourage you to try this recipe and share it with your loved ones. Baking is all about creating memories and spreading joy, and these Peppermint Mocha Cookies are sure to do just that. Happy baking!
Frequently Asked Questions:
Can I make the dough ahead of time?
Yes, you absolutely can! Once the dough is made, wrap it tightly in plastic wrap and store it in the refrigerator for up to 3 days. You may need to let it soften slightly at room temperature for a few minutes before scooping and baking.
How should I store leftover Peppermint Mocha Cookies?
Store your cooled Peppermint Mocha Cookies in an airtight container at room temperature for up to 5 days. For longer storage, you can freeze them in a single layer on a baking sheet until firm, then transfer them to a freezer-safe bag or container for up to 3 months.
Peppermint Mocha Cookies-Festive Coffee Treat
Deliciously festive cookies that combine the rich flavors of chocolate and coffee with a hint of refreshing peppermint, perfect for holiday celebrations.
Ingredients
-
1 cup (227g) unsalted butter, softened
-
1¼ cup (250g) granulated sugar, plus extra for rolling
-
1 large egg
-
1 teaspoon pure vanilla extract
-
½ teaspoon pure peppermint extract
-
½ teaspoon baking powder
-
½ teaspoon fine sea salt
-
¼ teaspoon baking soda
-
2¼ cups (280g) all-purpose flour
-
½ teaspoon instant coffee granules
-
2 tablespoons unsweetened cocoa powder
-
Pink food gel
Instructions
-
Step 1
In a large mixing bowl, cream together the softened butter and granulated sugar until light and fluffy. Beat in the egg and vanilla extract until well combined. Stir in the peppermint extract and instant coffee granules. -
Step 2
In a separate bowl, whisk together flour, cocoa powder, baking powder, baking soda, and salt. Gradually add this dry mixture to the wet ingredients, mixing until just combined. Do not overmix. -
Step 3
Divide the dough in half. Add pink food gel to one half and knead until uniformly colored. Gently marble the pink and chocolate doughs by tearing and pressing pieces together, folding and twisting a few times to create streaks. Wrap and refrigerate for at least 1 hour. -
Step 4
Preheat oven to 350°F (175°C). Line baking sheets with parchment paper. Roll out the marbled dough to ¼-inch thickness on a lightly floured surface. Cut out shapes using cookie cutters. Lightly press the tops into granulated sugar. -
Step 5
Arrange cookies on prepared baking sheets, leaving 2 inches between them. Bake for 9-12 minutes, or until edges are set and lightly golden. The center should still look soft. -
Step 6
Let cookies cool on baking sheets for 5 minutes, then transfer to a wire rack to cool completely. Allow flavors to meld for best results.
Important Information
Nutrition Facts (Per Serving)
It is important to consider this information as approximate and not to use it as definitive health advice.
Allergy Information
Please check ingredients for potential allergens and consult a health professional if in doubt.