Sticky Coconut Cake – Irresistible Tropical Dessert
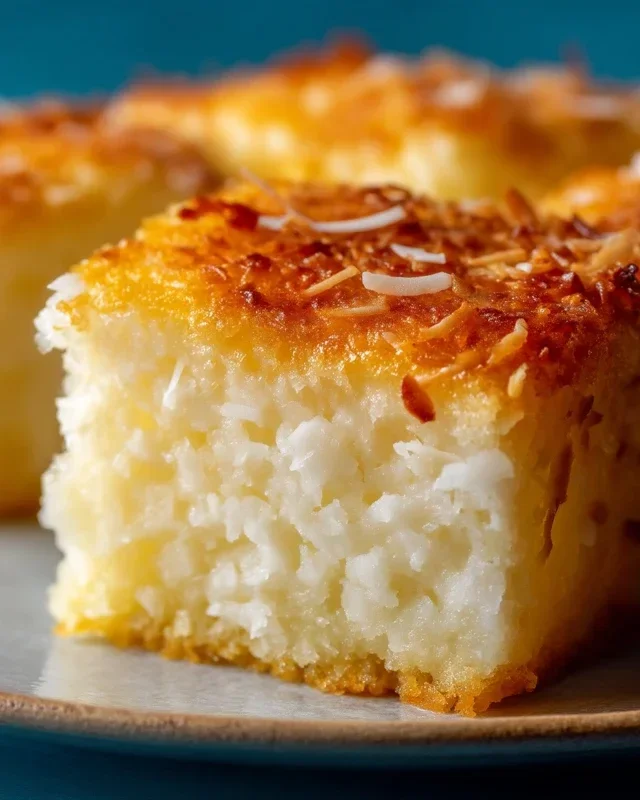
Sticky Coconut Cake is an absolute dream, and if you haven’t tried it yet, prepare to be swept away! There’s something undeniably comforting and utterly decadent about this tropical delight. It’s that perfect balance of moist, tender cake infused with the sweet, nutty fragrance of coconut, all crowned with a luscious, melt-in-your-mouth sticky topping. This isn’t just any cake; it’s an experience. People adore Sticky Coconut Cake because it evokes sunshine, holidays, and pure indulgence. What truly sets this particular recipe apart is its simplicity without compromising on flavour. We’ve perfected a method that ensures a gloriously golden crum extractb and a caramelised glaze that clings to every bite, making each forkful an irresistible cascade of sweet, coconutty goodness.
Sticky Coconut Cake
There are some desserts that just feel like a warm hug, and this Sticky Coconut Cake is definitely one of them. It’s incredibly moist, wonderfully fragrant with coconut, and has a delightfully chewy texture that makes it utterly irresistible. This isn’t your average dry, crum extractbly cake; it’s rich, dense, and packed with the tropical goodness of coconut. It’s perfect for a weekend treat, a special occasion, or even just to brighten up an ordinary afternoon. The beauty of this cake lies in its simplicity, relying on a few key ingredients to create something truly magical. The glutinous rice flour is the secret weapon here, giving it that signature chewy, sticky texture that is so addictive. I love how the sweetness of the sugar and the creamy richness of the coconut milk meld together to create a perfectly balanced flavor profile. Let’s get started and create this delightful treat!
Ingredients:
Preparing the Batter
The first step in creating this luscious Sticky Coconut Cake is to prepare the wet ingredients and combine them thoroughly. In a large mixing bowl, I like to start by whisking together the egg yolks. Then, gradually add the granulated sugar to the egg yolks, beating them until the mixture becomes pnon-alcoholic ale yellow and slightly thickened. This process incorporates air and helps to dissolve the sugar, leading to a smoother final texture. Next, pour in the full-fat canned coconut milk. Make sure to use full-fat for the best richness and flavor. Stir in the vanilla extract; this little addition really rounds out the flavors and adds a beautiful aroma.
Now it’s time to incorporate the star of the show: the shredded sweetened coconut. Add all 3 cups of the shredded coconut to the wet ingredients. Gently fold it in with a spatula until everything is just combined. Don’t overmix at this stage; we want to keep the batter airy. This mixture will already look and smell incredibly delicious!
Incorporating the Flour and Egg Whites
The next crucial step is to introduce the glutinous rice flour and the egg whites. In a separate bowl, add the 1½ cups of glutinous rice flour. Glutinous rice flour, also known as sweet rice flour, is what gives this cake its characteristic chewy and sticky texture. It’s different from regular rice flour, so make sure you have the correct type.
Now, take your separated egg whites. In a clean, dry bowl (it’s essential that there’s no trace of fat or yolk in this bowl, as it can prevent the egg whites from whipping properly), whip the egg whites until stiff peaks form. You can use an electric mixer for this, which makes it much easier. Stiff peaks mean that when you lift the whisk, the egg whites stand up straight and don’t droop. This aeration is vital for creating a lighter texture within the dense cake.
Once you have your stiff egg whites, it’s time to gently fold them into the coconut milk mixture. Add about a third of the whipped egg whites to the coconut mixture and gently fold them in. This is called “lightening the batter,” and it helps to make the folding of the remaining egg whites easier and less likely to deflate them. Once that’s incorporated, gently fold in the remaining egg whites in two more additions. Be careful not to overmix; you want to maintain as much air as possible. Finally, gradually add the glutinous rice flour to this mixture, folding it in gently until just combined. Again, avoid overmixing. The batter should be thick but pourable.
Baking the Cake
Now comes the exciting part: baking our Sticky Coconut Cake! Preheat your oven to 350 degrees Fahrenheit (175 degrees Celsius). Grease and flour a 9×13 inch baking pan. I like to line the bottom of the pan with parchment paper as well, as this makes it even easier to remove the cake once it’s baked. Pour the thick batter evenly into the prepared pan. Smooth the top with a spatula to ensure even baking.
Bake for approximately 40-50 minutes, or until a toothpick inserted into the center comes out clean and the top of the cake is golden brown and firm to the touch. The aroma that will fill your kitchen during this time is absolutely heavenly! Be patient; sometimes a denser cake like this can take a little longer to cook through. You can test for doneness by gently pressing the center of the cake. If it springs back, it’s likely ready.
Cooling and Serving
Once baked, remove the cake from the oven and let it cool in the pan on a wire rack for about 15-20 minutes. This initial cooling period is important to allow the cake to set up properly before you attempt to remove it from the pan. After the initial cooling, carefully invert the cake onto the wire rack to cool completely. If you used parchment paper, you can peel it off now.
Once the Sticky Coconut Cake is completely cool, you can slice it into squares. This cake is delicious on its own, but I also love to serve it with a dollop of whipped cream or a scoop of vanilla ice cream. The warm, chewy, and intensely coconutty flavors are truly divine. You can also sprinkle a little extra shredded coconut on top for added texture and visual appeal. Enjoy every wonderfully sticky, moist, and flavorful bite!
Conclusion:
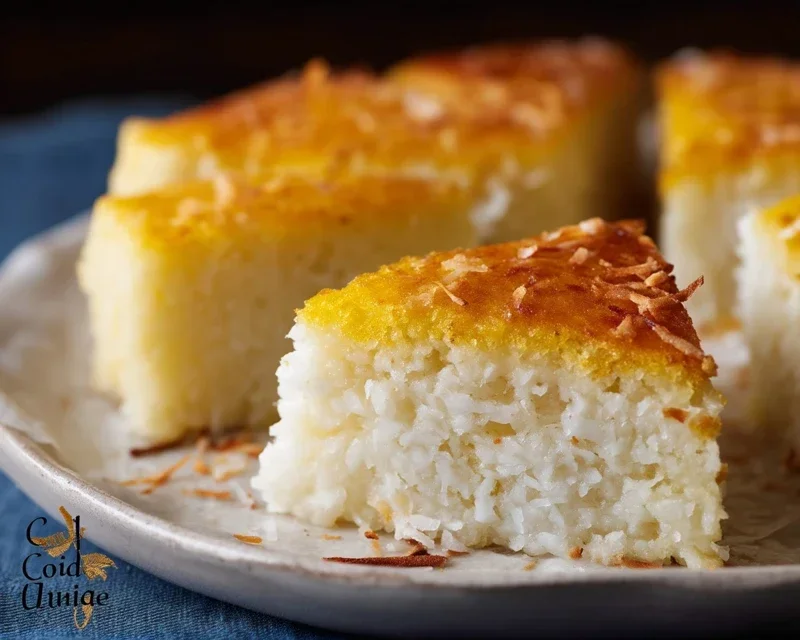
I hope you’re as excited to bake this Sticky Coconut Cake as I am to eat it! This recipe is truly a winner because it delivers on both incredible flavor and satisfying texture. The moist, tender crum extractb infused with sweet coconut milk, paired with that irresistible sticky caramel topping, makes it a dessert that’s both comforting and sophisticated. It’s perfect for any occasion, from a casual afternoon tea with friends to a more special celebration. Don’t be intimidated by the “sticky” part; the instructions are straightforward, and the results are so worth it. I encourage you to give this Sticky Coconut Cake a try – you won’t regret it!
For serving suggestions, this cake is divine on its own, but I also love it with a dollop of fresh whipped cream or a scoop of vanilla bean ice cream to balance the sweetness. For variations, consider adding a sprinkle of toasted shredded coconut on top just before serving for an extra textural element, or a hint of lime zest to the batter for a brighter flavor profile.
Frequently Asked Questions:
Q: Can I make this Sticky Coconut Cake ahead of time?
Absolutely! The cake itself can be baked a day in advance and stored at room temperature, tightly covered. The sticky topping is best made and drizzled just before serving to ensure it’s warm and gooey. However, if you need to prepare it a few hours ahead, the topping will still be delicious, though slightly less fluid.
Q: What kind of coconut milk should I use?
I recommend using full-fat canned coconut milk for the richest flavor and best texture. Light coconut milk might result in a less dense and flavorful cake. Make sure to shake the can well before opening or use the solid cream that separates at the top.
Sticky Coconut Cake
A sweet and decadent sticky coconut cake made with glutinous rice flour and full-fat coconut milk, topped with toasted coconut.
Ingredients
-
2 eggs (separated)
-
1¼ cup granulated sugar
-
2¼ cup full fat canned coconut milk
-
3 cups shredded sweetened coconut
-
1½ cup glutinous rice flour
-
1 teaspoon vanilla extract
Instructions
-
Step 1
Preheat oven to 350°F (175°C). Grease and flour a 9×13 inch baking pan. Toast 1 cup of the shredded coconut in a dry skillet over medium heat until golden brown, then set aside for topping. -
Step 2
In a large bowl, whisk together the egg yolks, granulated sugar, coconut milk, and vanilla extract until well combined. -
Step 3
Gradually whisk in the glutinous rice flour until a smooth batter forms, ensuring no lumps. -
Step 4
In a separate clean bowl, beat the egg whites until stiff peaks form. -
Step 5
Gently fold the beaten egg whites into the batter until just combined. Do not overmix. -
Step 6
Pour the batter into the prepared baking pan. Sprinkle the remaining 2 cups of shredded sweetened coconut evenly over the top. -
Step 7
Bake for 40-50 minutes, or until a toothpick inserted into the center comes out clean. The top should be golden brown. -
Step 8
Let the cake cool in the pan for at least 15 minutes before inverting it onto a wire rack to cool completely. Sprinkle with the toasted coconut before serving.
Important Information
Nutrition Facts (Per Serving)
It is important to consider this information as approximate and not to use it as definitive health advice.
Allergy Information
Please check ingredients for potential allergens and consult a health professional if in doubt.