Cherry Dr Pepper Grilled Chicken-Sweet & Tangy
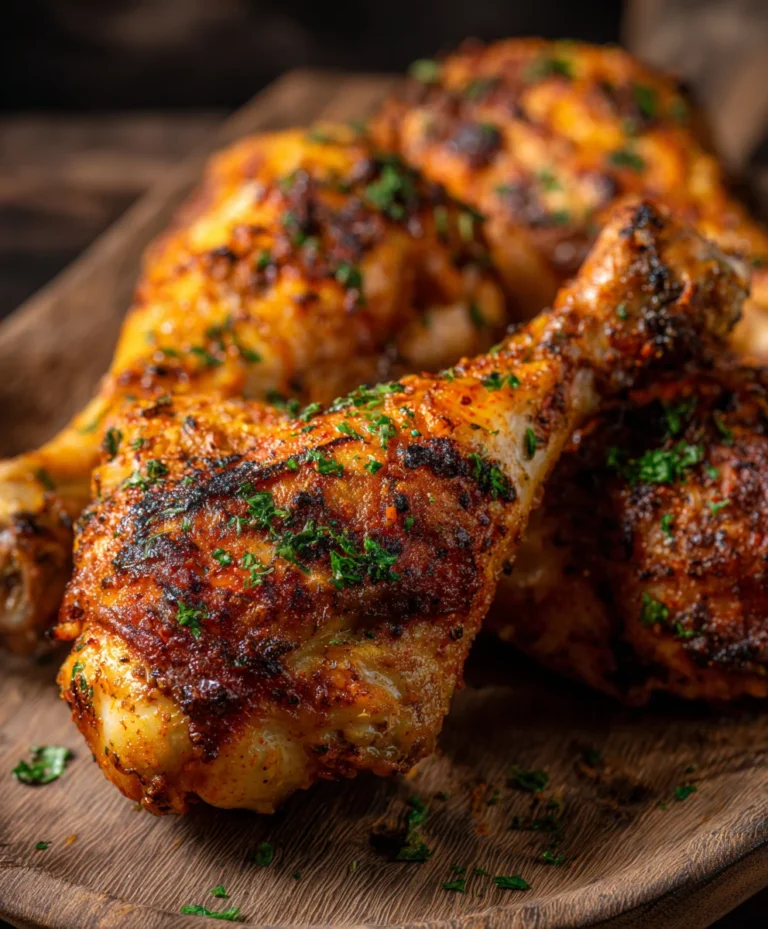
Cherry Dr. Pepper Grilled Chicken is about to become your new summer obsession. Forget bland, boring chicken; this recipe takes your backyard grilling game to a whole new level of deliciousness. Imagin extracte tender, juicy chicken thighs infused with the unique, sweet-and-tangy flavor profile that only a Dr. Pepper glaze can deliver, with an extra burst of bright, fruity cherry goodness. This isn’t just another grilled chicken recipe; it’s an experience. It’s the perfect balance of smoky char from the grill and that unmistakable effervescent sweetness that makes everyone ask for seconds. Whether you’re hosting a casual cookout or just looking to liven up a weeknight dinner, this Cherry Dr. Pepper Grilled Chicken is guaranteed to impress. Get ready for smiles and satisfied sighs all around!
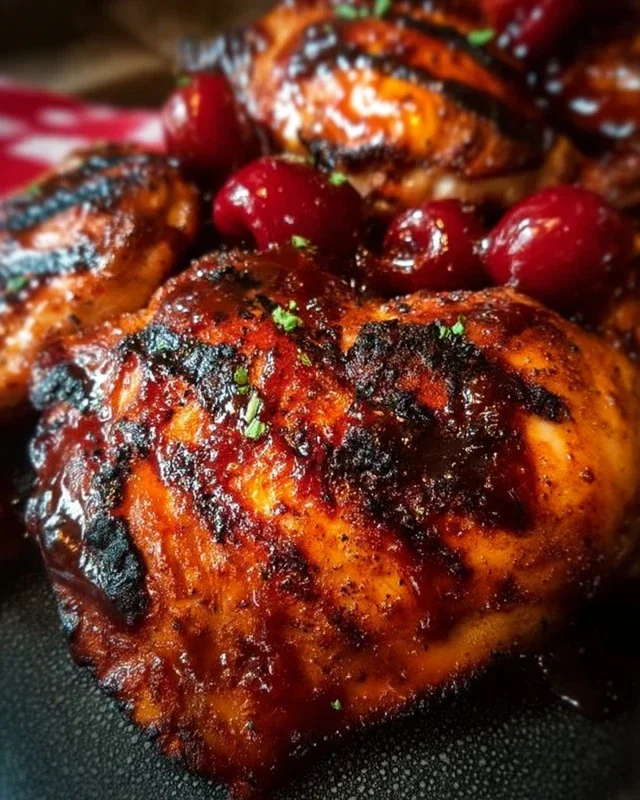
Cherry Dr. Pepper Grilled Chicken
Get ready for a flavor explosion that will have everyone beggin extractg for your secret recipe! This Cherry Dr. Pepper Grilled Chicken is a game-changer, offering a perfect blend of sweet, tangy, and savory notes with a delightful smoky char from the grill. The secret? A surprisingly simple yet incredibly effective glaze made with everyone’s favorite bubbly cherry soda. It’s the ultimate crowd-pleaser, perfect for backyard barbecues, family dinners, or just a fun weeknight meal. The tender, juicy chicken coated in this unique sauce is an absolute delight.
Ingredients:
Cooking Instructions:
Step 1: Preparing the Cherry Dr. Pepper Glaze
The magic of this dish lies in the incredible glaze. To start, grab a medium saucepan and pour in the entire 12 oz can of Cherry Dr. Pepper. We’re going to let some of that carbonation work its magic by bringin extractg it to a gentle simmer over medium heat. Let it simmer for about 5-7 minutes, allowing some of the liquid to evaporate and the flavors to concentrate slightly. While it’s simmering, you can start adding the other glaze ingredients. Add the ketchup, tomato paste, brown sugar, Worcestershire sauce, onion powder, black pepper, liquid smoke, chili powder, and minced garlic. Stir everything together until it’s well combined. Continue to simmer this mixture over low heat, stirring occasionally, for about 15-20 minutes, or until it has thickened to a syrupy consistency. You’re looking for a glaze that will coat the back of a spoon beautifully. This reduction process is key to developing that intense, caramelized flavor that makes this chicken so special. Don’t rush this step; a well-reduced glaze will cling to the chicken and deliver maximum flavor.
Step 2: Seasoning the Chicken
While your glaze is simmering away, it’s time to prepare the chicken. If you’re using a whole chicken cut into pieces, make sure they are nicely separated and patted dry with paper towels. This is an important step as it helps the seasoning adhere better. Now, generously season each piece of chicken with the seasoning salt and paprika. Make sure to get all sides of the chicken, under the skin if possible, for maximum flavor penetration. The seasoning salt provides a savory base, while the paprika adds a subtle sweetness and a beautiful reddish hue to the finished product. If you are using pre-cut dark meat chicken pieces, like thighs and drum extractsticks, ensure they are also patted dry before seasoning. A good, even coating of seasoning is crucial for that delicious first bite.
Step 3: Marinating the Chicken (Optional but Recommended)
For an extra layer of flavor and tenderness, I highly recommend marinating the chicken. Once your chicken is seasoned, place it in a large resealable bag or a shallow dish. Pour about half of your prepared Cherry Dr. Pepper glaze over the chicken, ensuring each piece is coated. Seal the bag or cover the dish, and refrigerate for at least 1 hour, or preferably 2-4 hours. This allows the chicken to absorb those fantastic sweet and tangy flavors. If you’re short on time, you can skip this step, but the results are truly worth the extra effort. Just be sure to reserve the remaining glaze for basting during grilling.
Step 4: Grilling the Chicken
Now for the main event – grilling! Preheat your grill to medium-high heat. This is important for getting a good sear on the chicken while ensuring it cooks through without burning. If you marinated your chicken, remove it from the marinade and let any excess drip off. Place the seasoned chicken pieces directly on the hot grill grates. We want to achieve those beautiful grill marks and get a nice char. Grill the chicken for about 5-7 minutes per side, depending on the size of the pieces. During the last 10-15 minutes of grilling, begin extract basting the chicken generously with the reserved Cherry Dr. Pepper glaze. Apply a fresh coat of glaze every few minutes. This is where the magic really happens, as the glaze caramelizes and forms a sticky, delicious coating on the chicken.
Step 5: Achieving Perfect Doneness and Resting
Continue grilling and basting until the chicken reaches an internal temperature of 165 degrees Fahrenheit (74 degrees Celsius) in the thickest part of the meat, avoiding the bone. The juices should run clear. Be mindful not to overcook the chicken, as this can lead to dry meat. The glaze can burn easily if the heat is too high, so keep an eye on it and adjust your grill temperature as needed. Once the chicken is cooked through and beautifully glazed, remove it from the grill and let it rest for 5-10 minutes before serving. This resting period is crucial; it allows the juices to redistribute throughout the chicken, resulting in incredibly moist and tender pieces. Serve your delectable Cherry Dr. Pepper Grilled Chicken hot, with extra glaze on the side for dipping, if desired. This dish is fantastic served with a side of coleslaw, potato salad, or grilled corn. Enjoy the sweet, savory, and smoky perfection!
Conclusion:
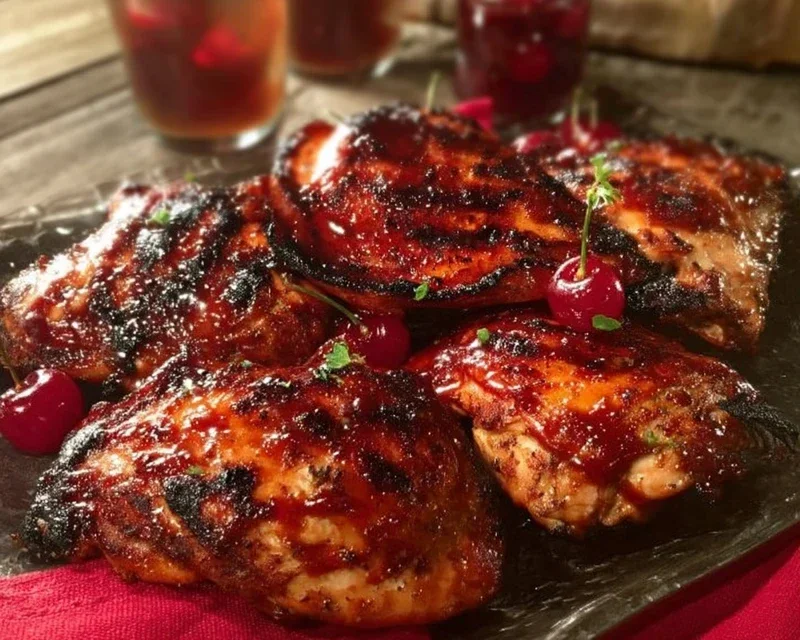
This Cherry Dr. Pepper Grilled Chicken recipe is an absolute game-changer for your next backyard BBQ or weeknight dinner! The unique combination of sweet cherry and the distinctive kick of Dr. Pepper creates a wonderfully caramelized and incredibly tender chicken that’s bursting with flavor. It’s surprisingly easy to whip up, making it perfect for both novice and experienced grill masters. The tangy sweetness of the marinade beautifully complements the smoky char from the grill, resulting in a dish that’s both comforting and exciting. I truly encourage you to give this Cherry Dr. Pepper Grilled Chicken a try; you won’t be disappointed!
Serve this flavorful chicken alongside classic BBQ sides like corn on the cob, potato salad, or coleslaw. For a lighter option, a fresh green salad or grilled asparagus pairs wonderfully. If you’re feeling adventurous, try adding a sprinkle of red pepper flakes to the marinade for a touch of heat, or experiment with different fruit juices like cherry limeade for a subtle twist.
Frequently Asked Questions:
Can I make this Cherry Dr. Pepper Grilled Chicken ahead of time?
Absolutely! You can marinate the chicken for up to 4 hours in the refrigerator. This allows the flavors to really penetrate the meat, making it even more delicious. Just be sure to bring it to room temperature for about 15-20 minutes before grilling for even cooking.
What if I don’t have a grill? Can I still make this?
Yes! While grilling adds that signature smoky flavor, you can achieve delicious results on the stovetop or in the oven. For stovetop cooking, pan-sear the chicken over medium-high heat until cooked through and nicely browned. In the oven, bake the chicken at 400°F (200°C) until it reaches an internal temperature of 165°F (74°C), basting with the remaining marinade towards the end.
How do I know when the chicken is fully cooked?
The safest way to ensure your chicken is cooked through is by using a meat thermometer. Insert it into the thickest part of the chicken breast or thigh, avoiding bone. It should register an internal temperature of 165°F (74°C). Visually, the juices should run clear, and the meat should no longer be pink in the center.
Cherry Dr. Pepper Grilled Chicken
A sweet and smoky grilled chicken recipe featuring a glaze made with Cherry Dr. Pepper, ketchup, and brown sugar.
Ingredients
-
1 – 12 oz can Cherry Dr. Pepper
-
1 Cup Ketchup
-
1 – 6 oz. can tomato paste
-
1 Cup Brown Sugar
-
1 Tablespoon Worcestershire sauce
-
1/2 tsp. Onion Powder
-
1/2 tsp. black pepper
-
1/2 tsp. liquid smoke
-
1/2 tsp. Chili Powder
-
1 tsp. minced garlic
-
1 whole chicken cut up OR 1 package of dark meat chicken cut up about 12 pieces of chicken
-
3 teaspoons Seasoning Salt
-
1 tsp Paprika
Instructions
-
Step 1
In a medium saucepan, combine the Cherry Dr. Pepper, ketchup, tomato paste, brown sugar, Worcestershire sauce, onion powder, black pepper, liquid smoke, chili powder, and minced garlic. Stir well. -
Step 2
Bring the mixture to a boil over medium heat, then reduce heat and simmer for 15-20 minutes, stirring occasionally, until the sauce has thickened into a glaze. -
Step 3
While the sauce simmers, season the chicken pieces generously with seasoning salt and paprika. -
Step 4
Preheat your grill to medium-high heat. Grill the chicken for about 15-20 minutes, flipping occasionally, until cooked through. -
Step 5
During the last 5-10 minutes of grilling, brush the chicken generously with the prepared Cherry Dr. Pepper glaze. Continue grilling and basting until the glaze is caramelized and sticky. -
Step 6
Remove chicken from grill and let rest for a few minutes before serving. Brush with additional glaze if desired.
Important Information
Nutrition Facts (Per Serving)
It is important to consider this information as approximate and not to use it as definitive health advice.
Allergy Information
Please check ingredients for potential allergens and consult a health professional if in doubt.