Easy Homemade Strawberry Ice Cream Recipe
Homemade strawberry ice cream is more than just a frozen treat; it’s a vibrant explosion of summer’s best flavors, captured in a creamy, dreamy delight. There’s something incredibly satisfying about scooping into a bowl of ice cream you’ve made yourself, especially when it’s bursting with the sweet, slightly tart taste of ripe strawberries. Forget those artificial-tasting store-bought versions – this homemade strawberry ice cream recipe lets you control the sweetness and the intensity of that glorious fruit flavor. We’re talking about real strawberries, churned into a smooth, luscious base that’s utterly irresistible. It’s the perfect way to capture those long, sunny days and savor the peak season for this beloved berry. Get ready for a taste of pure, unadulterated happiness, one scoop at a time!
Why You’ll Love This Recipe:
• Unbeatable Freshness:
Taste the difference that fresh, ripe strawberries make.
• Simple Ingredients:
Easily found ingredients mean you can whip this up with minimal fuss.
• Customizable Perfection:
Adjust sweetness and strawberry intensity to your exact liking.
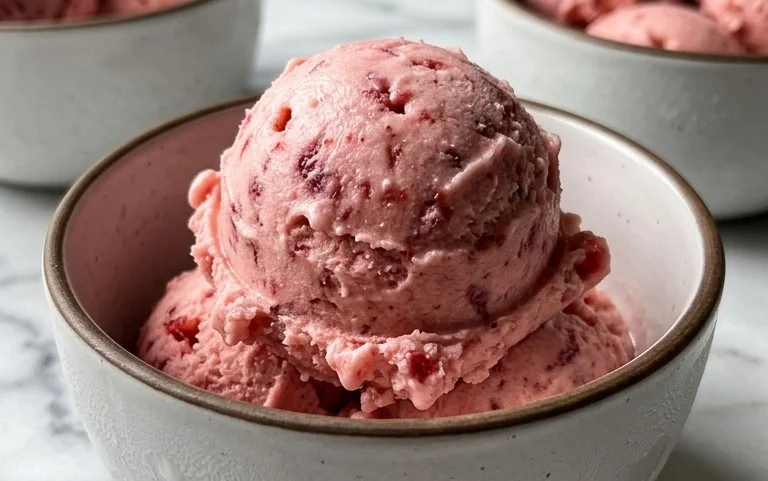
Homemade Strawberry Ice Cream
There’s something undeniably magical about homemade ice cream. The creamy texture, the intense flavor, and the satisfaction of creating something delicious from scratch – it’s a culinary adventure that never disappoints. And when it comes to classic flavors, nothing beats the vibrant sweetness of strawberries. Forget those artificial-tasting store-bought versions; our homemade strawberry ice cream is bursting with the pure essence of fresh berries, offering a delightful and refreshing treat that’s surprisingly easy to whip up. Imagin extracte luscious, sweet strawberries blended into a rich, creamy base, resulting in a dessert that’s perfect for a warm afternoon, a special occasion, or simply when a craving strikes. This recipe prioritizes simplicity and flavor, ensuring you can achieve ice cream parlor quality right in your own kitchen.
The beauty of this recipe lies in its straightforward approach. We’re not relying on complex techniques or hard-to-find ingredients. Instead, we’re letting the quality of our core ingredients shine through. The sweetness of the strawberries is enhanced with just a touch of honey and sugar, while a hint of lemon juice brightens the fruit’s natural flavor without making the ice cream tart. The creamy base is formed from a perfect balance of heavy whipping cream and half-and-half, creating that signature smooth, luxurious mouthfeel. And of course, a dash of vanilla extract rounds out the flavor profile beautifully. So, gather your ingredients and let’s embark on this delightful journey to homemade strawberry ice cream bliss!
Ingredients:
Instructions:
1.
Preparing the Strawberry Puree:
Our first step is to unlock the vibrant flavor of the strawberries. In a medium bowl, combine the hulled and diced strawberries with the honey, granulated sugar, and lemon juice. The honey will add a subtle floral sweetness, while the sugar provides the necessary structure and sweetness for the ice cream. The lemon juice is a crucial ingredient here; it acts as a flavor enhancer, amplifying the natural sweetness and tartness of the strawberries without making the final product taste lemony. Stir everything together gently, ensuring the strawberries are well coated. You can let this mixture sit at room temperature for about 30 minutes to allow the sugar to start dissolving and the berries to release some of their juices. This maceration process intensifies the strawberry flavor. Once macerated, transfer the strawberry mixture to a blender or food processor. Blend until you have a smooth, vibrant puree. If you prefer a smoother ice cream with no berry seeds, you can pass the puree through a fine-mesh sieve at this stage, pressing down with a spoon to extract all the liquid and pulp. Discard any solids left in the sieve.
2.
Creating the Creamy Base:
Now, let’s craft the rich and creamy foundation for our strawberry ice cream. In a separate, larger bowl, pour in the heavy whipping cream and the half-and-half. These two dairy components work in harmony to create the perfect balance of richness and lightness. The heavy whipping cream contributes to that luxurious, velvety texture we all love in premium ice cream, while the half-and-half helps to temper the richness just enough, preventing it from becoming too heavy. Add the vanilla extract to this mixture. Vanilla is a wonderful supporting flavor that complements and enhances other sweet profiles, including strawberries, without overpowering them. Whisk the heavy cream, half-and-half, and vanilla extract together until they are well combined. You don’t need to whip this mixture to stiff peaks; we’re just looking for a homogenous blend.
3.
Combining the Flavors:
With our strawberry puree and creamy base ready, it’s time to bring them together. Gently pour the prepared strawberry puree into the bowl with the cream mixture. Using a whisk or a spatula, carefully fold the strawberry puree into the dairy base. Continue to stir until the mixture is uniformly pink and there are no streaks of cream or puree visible. It’s important to do this gently to avoid incorporating too much air at this stage, as that can affect the final texture of your ice cream. The goal here is a beautiful, marbled effect initially, which will blend into a cohesive and gorgeous pnon-alcoholic ale pink color as you stir. Taste a small spoonful of the mixture at this point. This is your chance to adjust the sweetness if you feel it’s necessary. Remember, the flavors will be slightly less intense when frozen, so don’t be afraid to add a little more sugar or honey if you desire a sweeter outcome.
4.
Chilling the Base:
This step is crucial for achieving the best texture and ensuring your ice cream churns properly. Once your strawberry and cream mixture is thoroughly combined, cover the bowl tightly with plastic wrap, making sure the wrap touches the surface of the liquid to prevent a skin from forming. Place the covered bowl in the refrigerator to chill for at least 4 hours, or preferably overnight. This extended chilling period allows the flavors to meld and deepen, and most importantly, it ensures the base is thoroughly cold. A very cold base churns more efficiently and results in smaller ice crystals, which translates to a smoother, creamier ice cream. Do not skip this step, as it significantly impacts the final quality of your homemade treat.
5.
Churning and Freezing the Ice Cream:
Now for the exciting part! Retrieve your thoroughly chilled ice cream base from the refrigerator. Pour the cold base into your ice cream maker and churn according to the manufacturer’s instructions. This typically takes about 20 to 30 minutes. During the churning process, air is incorporated into the base, and it begin extracts to freeze, transforming into a soft-serve consistency. The churning also breaks up ice crystals as they form, contributing to that smooth texture. Once churned to a soft-serve consistency, the ice cream is not yet fully firm. Transfer the churned ice cream into a freezer-safe container. For an extra burst of strawberry goodness, you can gently fold in a few extra diced strawberries at this stage if you like. Cover the container tightly, ensuring a good seal, and place it in the freezer for at least 4 to 6 hours, or until it’s firm enough to scoop. Enjoy the fruits of your labor!
Conclusion:
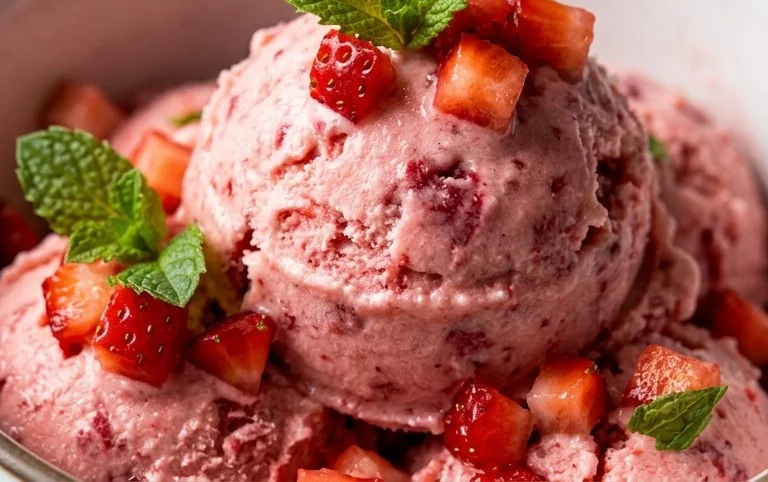
Making homemade strawberry ice cream is an incredibly rewarding experience, and this recipe makes it wonderfully accessible. The beauty of this method lies in its simplicity, allowing the vibrant, natural sweetness of fresh strawberries to truly shine without a complicated custard base. The result is a luxuriously creamy, intensely fruity frozen treat that will undoubtedly impress your family and friends, or simply be a delightful indulgence for yourself. Forget those artificial flavors and stabilizers; this is pure, unadulterated strawberry bliss.
For serving, this delightful homemade strawberry ice cream is fantastic on its own, but it also pairs beautifully with fresh baked goods like brownies or shortcake. Drizzle it with a bit of condensed milk or top with toasted almonds for an extra touch of elegance. Feeling adventurous? Consider adding a swirl of balsamic glaze for a surprising sweet and tangy contrast, or fold in some fresh basil for an herbaceous twist.
I truly encourage you to give this recipe a try. It’s a delicious way to capture the essence of summer in a scoop and proves that you don’t need fancy equipment to create something truly special. Happy churning!
Frequently Asked Questions:
Can I make this strawberry ice cream without an ice cream maker?
Absolutely! While an ice cream maker makes the process smoother, you can achieve great results by freezing the mixture in a shallow container and stirring it vigorously with a fork or whisk every 30-45 minutes for the first 3-4 hours. This breaks up ice crystals and creates a creamier texture.
What’s the best way to get the most intense strawberry flavor?
Using ripe, in-season strawberries is key. For an even more concentrated flavor, you can macerate the strawberries (mix them with a little sugar and let them sit for 30 minutes) before pureeing them. This draws out their juices and intensifies their natural sweetness and aroma.
Homemade Strawberry Ice Cream
A simple and delicious homemade strawberry ice cream recipe, perfect for a warm day. Made with fresh strawberries and classic dairy. No alcohol involved.
Ingredients
-
1 1/2 cups strawberries, hulled and diced
-
2 Tbsp honey
-
1/2 cup granulated sugar
-
1 tsp lemon juice
-
1 cup heavy whipping cream
-
1/2 cup half and half
-
1 tsp vanilla extract
Instructions
-
Step 1
In a bowl, combine the hulled and diced strawberries with the honey, granulated sugar, and lemon juice. Stir gently and let sit for about 15-20 minutes to allow the strawberries to macerate. -
Step 2
Transfer the macerated strawberries to a blender or food processor. Blend until smooth. For a smoother texture, you can strain the purée through a fine-mesh sieve to remove seeds, but this is optional. -
Step 3
In a separate large bowl, whisk together the heavy whipping cream, half and half, and vanilla extract until well combined. -
Step 4
Gently fold the strawberry purée into the cream mixture. Stir until the color is evenly distributed. -
Step 5
Pour the mixture into an ice cream maker and churn according to the manufacturer’s instructions until it reaches a soft-serve consistency. -
Step 6
Transfer the churned ice cream to an airtight container and freeze for at least 2-4 hours, or until firm.
Important Information
Nutrition Facts (Per Serving)
It is important to consider this information as approximate and not to use it as definitive health advice.
Allergy Information
Please check ingredients for potential allergens and consult a health professional if in doubt.